
Q: I have ten coverage studies I need to run. How can I set these up to run overnight?
A: When you set up a coverage study (from the Coverage|Area Coverage menu in TAP), you have the option of starting the execution of the study immediately, or saving the study for execution later.
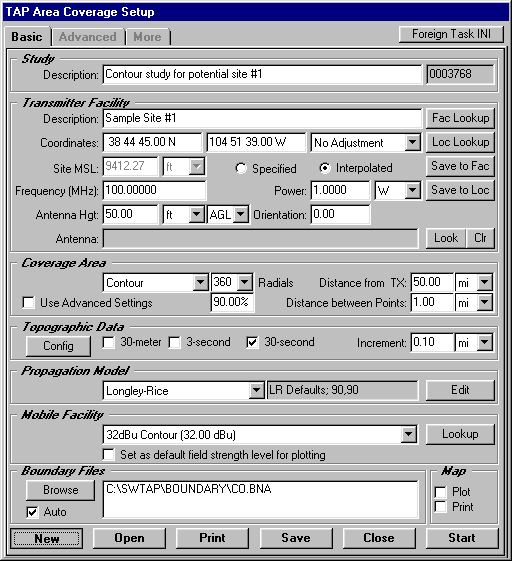
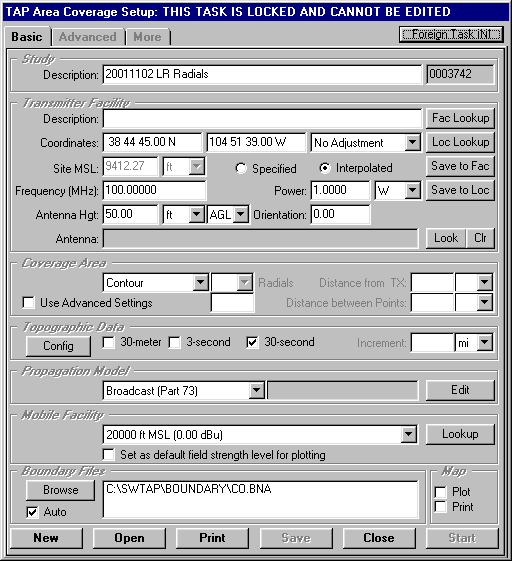
For example, suppose you have created a study as shown below.
If you want to save the study for later execution, instead of clicking the Start button (which starts the study immediately), click the save button. The parameters for the study will be saved into the TAP Task Data Base, and into files into the SWTAP\WORK folder using the Task ID (shown in the upper right area of the form). The files for this particular Task will be saved as T0003768.INI, T0003768.TXT, etc.)
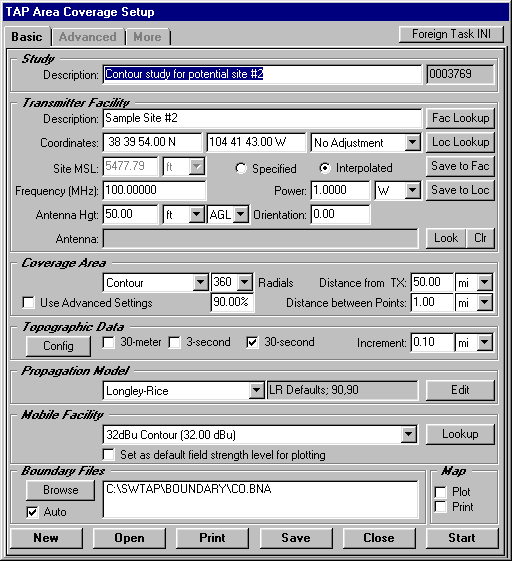
When the study has been saved you can still make changes, and then save those changes. When the study setup has been saved the way you want it you can create a new study by clicking the New button.
You will notice that the Task ID is automatically incremented. You can make changes for the next study you want to setup, then click the Save button to save the new Task (in this example, 0003769):
When you are finished setting up the studies, you can click the Close button to leave the Area Coverage Setup form.
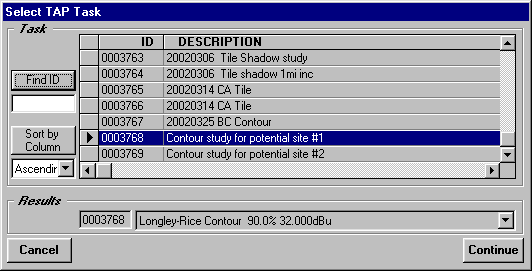
In TAP 4.3 and later, you also have the ability to open a previously created Task. For example, to go back to the first Task created, you can click the Open button, and a list of available Tasks is displayed:
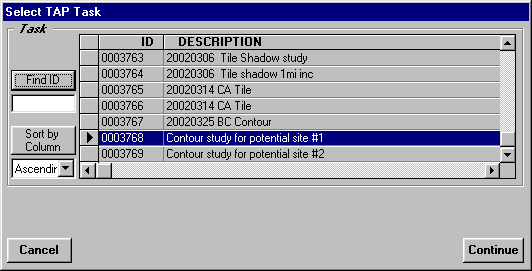
You can select the Task you want, then click the Continue button, and the Task parameters are displayed and can be changed and edited, then saved again before executing the Task:
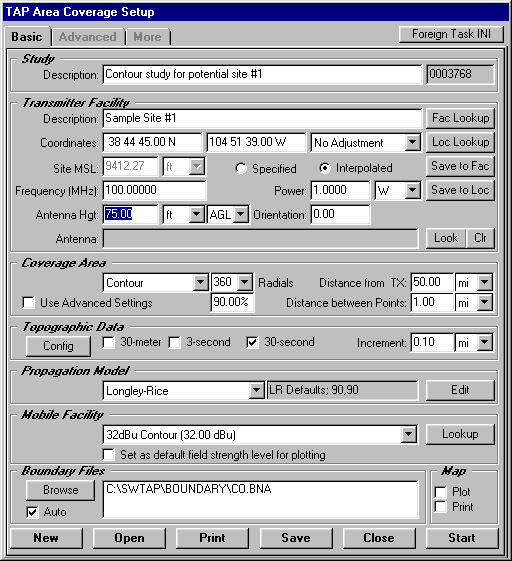
Note that if you open an earlier Task that has already been executed, you cannot edit the parameters (notice the "TASK IS LOCKED" flag in the caption of the form).
This is to prevent confusion between parameters that are changed and don't reflect the study that has already been run. If you want to run a study based on an earlier, "locked" Task, you can open the locked Task, then click the New button to create a new Task with the same parameters and you will be able to change the desired parameters.
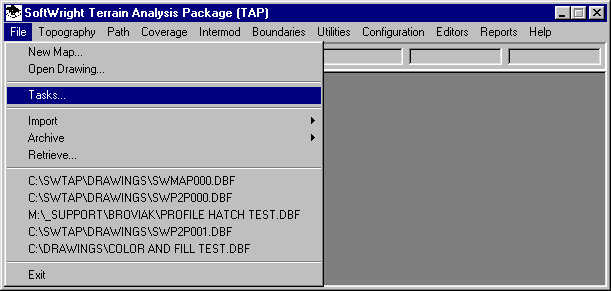
After the Tasks you want to run have been created, you can execute multiple Tasks together from the File|Tasks menu:
The Task List form is displayed:
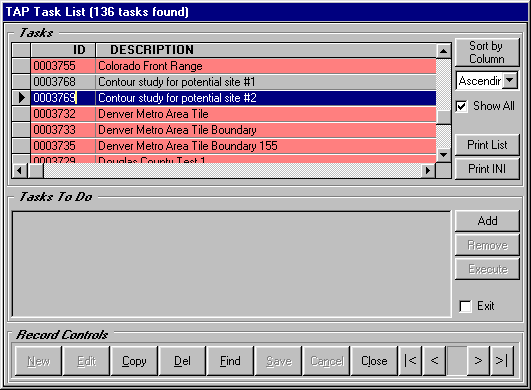
The Tasks highlighted in red have already been executed and cannot be run again. (Note that the Task List can include coverage studies as discussed in this example, as well as Area Grid studies and Intermodulation studies. Any Tasks from the list can be executed together.)
You can highlight the Task(s) you want to execute:
Then click the Add button in the Tasks To Do section in the lower half of the form:
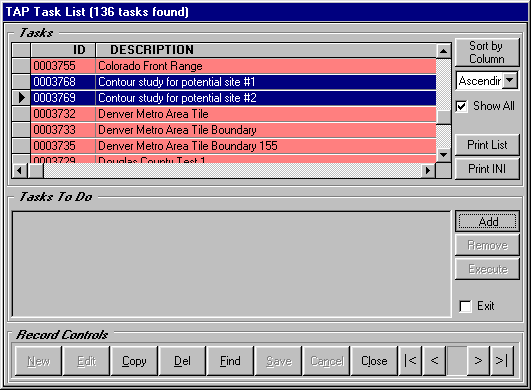
The Tasks will be added to the list, and you can click the Execute button to start the execution of all the Tasks on the list:

The Exit check box can be checked to cause TAP to close when the list is completed. This may be useful, for example, if automatic tape backup software is scheduled to run overnight and you want to exit from TAP when the Tasks are done.
Each Task will be executed, with the progress displayed:

When the last Task is completed, TAP will return to the main menu (unless the exit box is checked as described above.) Since multiple Tasks may have been executed, the Map Plot Setup form is not displayed automatically as it is when you click the Start button from the Area Coverage Setup form to run the study immediately.
You can plot the computed coverages from the File|New Map menu:

The Map Plot Setup form is displayed.
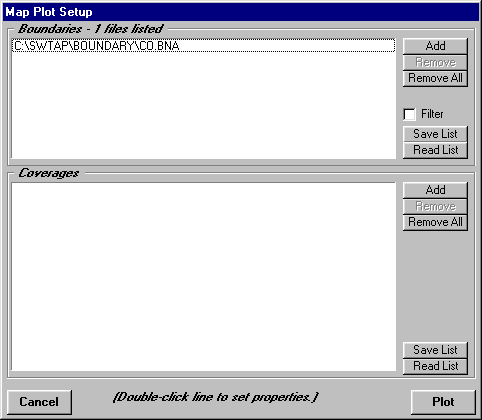
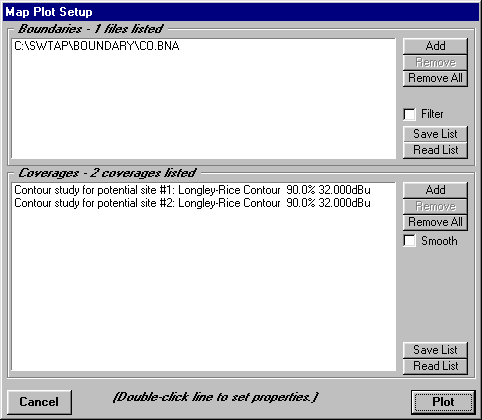
You can use the Add buton in the Coverages section in the lower half of the form to select the complted studies you want to plot:
After you select the studies (one at a time using the Add button), the studies are listed on the Map Plot Setup form:
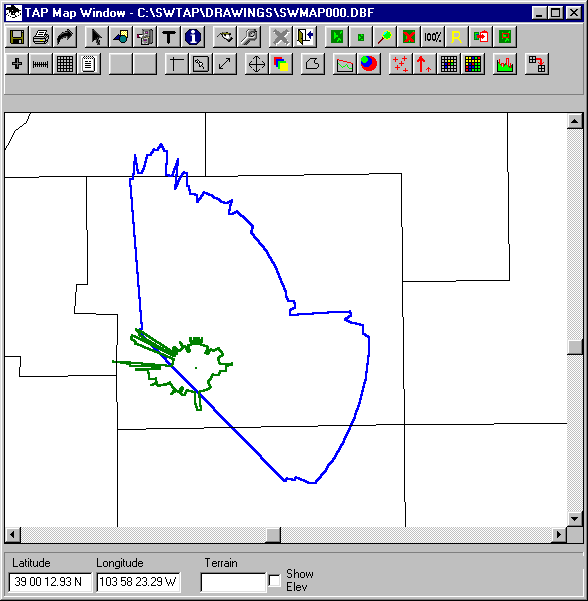
Click the Plot button to draw a map with the coverages:
Copyright 2002 by SoftWright LLC