Default Layers in HDMapper™
Q: How can I set the layers I want as default settings in HDMapper?
A: You can add or remove layers manually from HDMapper drawings, but you can also set a standard group of layers to use when drawing a TAP coverage study.
(This article describes the "Default Layers" function for TAP 5.0.1031 systems with a Maintenance Subscription date of November 30, 2004, or later.)
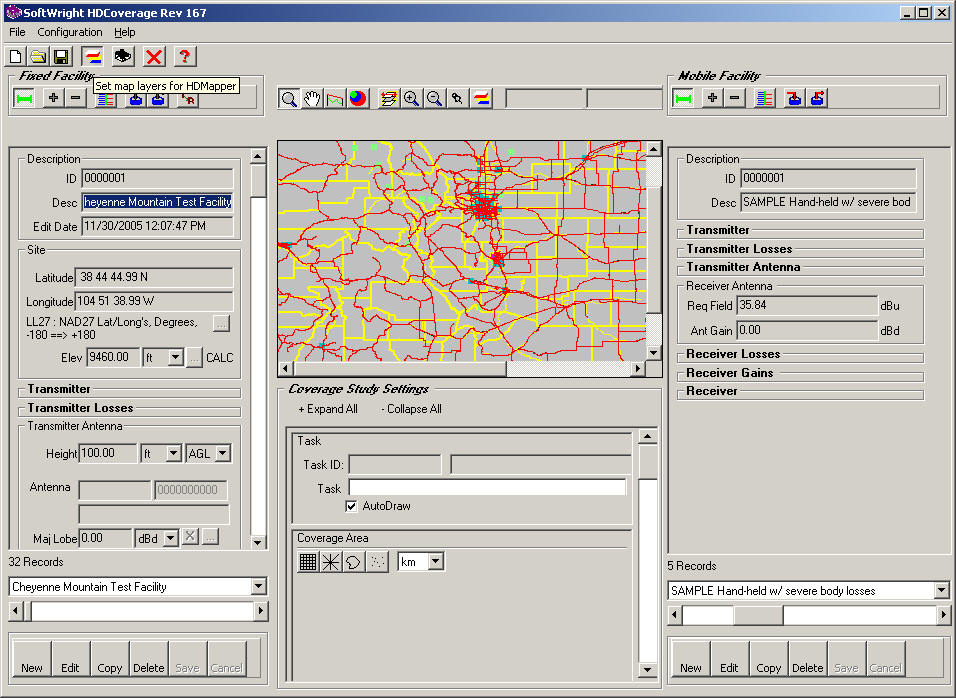
(If you want to set the layers displayed in the map on the HDCoverage form itself, click the button with the same icon located above the HDCoverage map.)
In TAP6, this function is found in the HDCoverage with the "Set map layers for HDMapper" button"
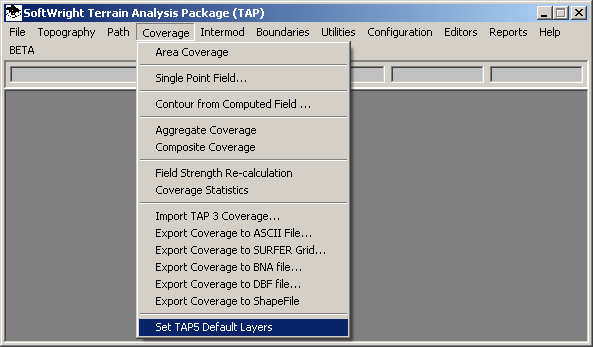
If you are running the TAP5 program, from the Coverage menu, select "Set TAP5 Default Layers":
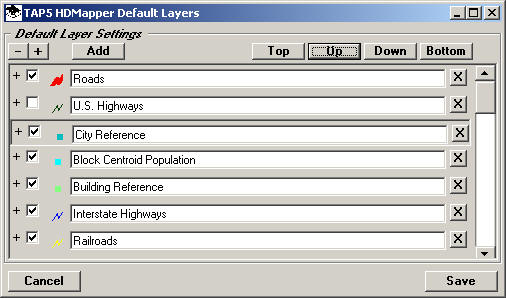
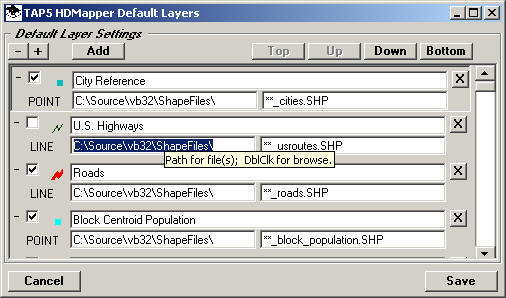
The HDMapper Default Layers form will be displayed:
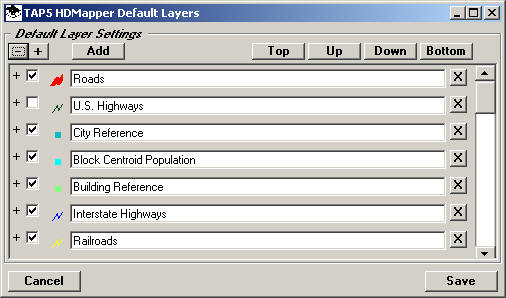
You can select layers by checking the box for each layer:
Layer Symbols
You can double-click the symbol for a layer to change the color and other properties for that layer. The Symbol Settings form will be displayed:
Click the Color section to change the color. Other properties are described in the HDMapper Color Settings article.
When you close the Symbol Settings form, the new settings are shown on the Default Layers form:
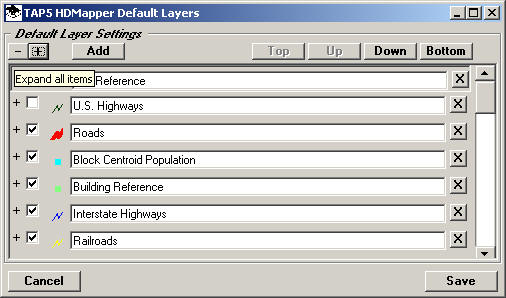
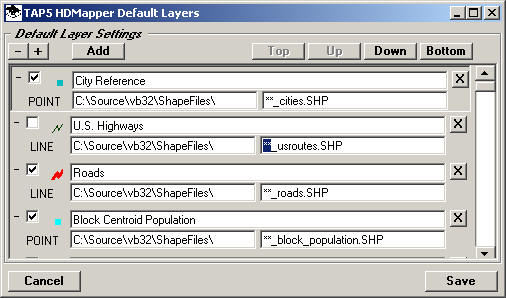
Expand/Collapse Entries
You can use the "-" and "+" symbols to the left of each layer to collapse the layer information for individual layers:
You can use the "-" and "+" buttons above the list to collapse or expand all the layers:
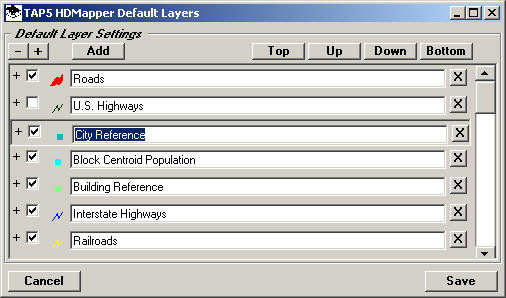
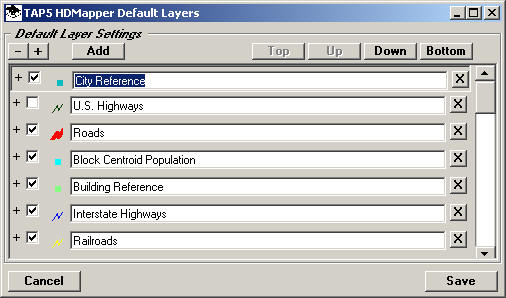
You can click the description of a layer to select that layer:
Layer Order
You can use the "Top", "Up", "Down", and "Bottom" buttons to move the selected layer in the layer order:
The layer position in the list will be used for the layer order when the map is drawn:
You can change the layer order after the map is drawn.
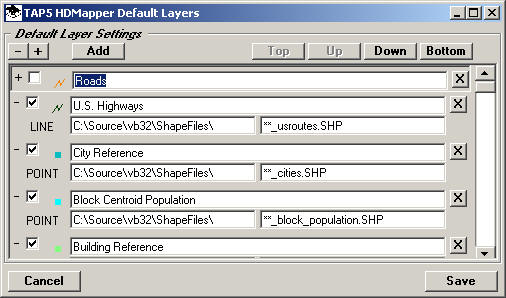
When the layers are expanded you can view and edit the path and file name information:
Select a Path
You can enter a path by hand, or double-click the path box to browse to find a path where you want to search for shapefiles:
Select Shapefile(s)
You can enter a file name by hand, or double-click the file box to browse to find a file name you want to use for a shapefile:

As shown in this example, when you browse to find a file you can select a particular file name. If you want the program to search for files based on the center of the coverage area you can change the file name to include a double wildcard "**" character. (Single wildcard characters "*" in the file names will be used as normal Windows wildcards.):
When TAP creates a new map (.SMF) file (for a coverage study, aggregate study, or TAP5 talkback study) the location will be determined and the abbreviation for the area will be substituted for the wildcard. For example, in the United States, the wildcard will be replaced with the two-letter state abbreviation. Locations outside of the U.S. use abbreviations described in another article.
If you enter a file name without a wildcard character that file will be included on all maps.
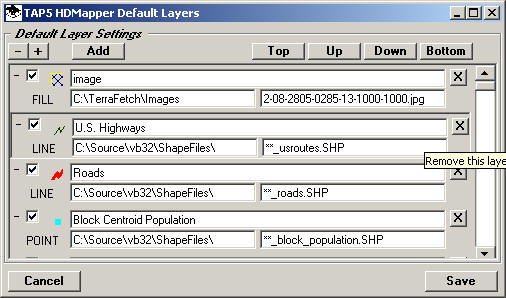
You can add a new layer by clicking the Add button:
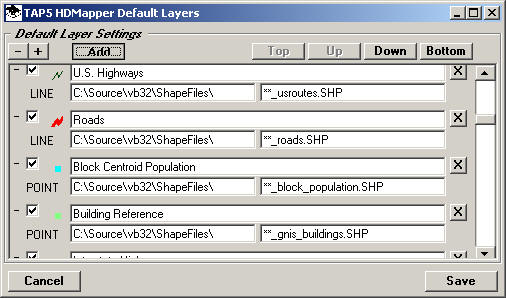
The new layer is added at the end of the list:
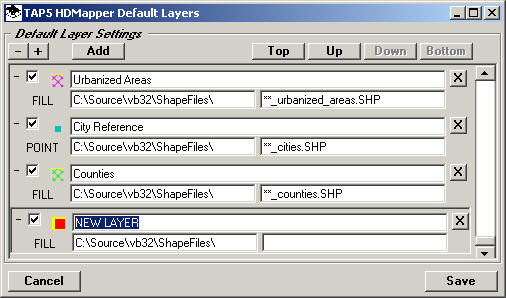
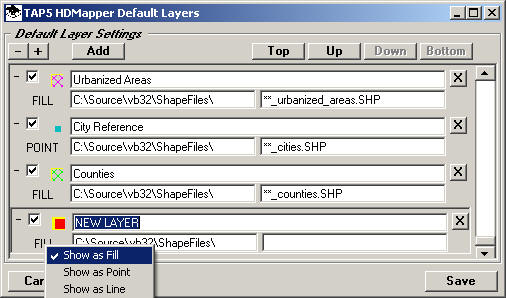
When a new layer is added, or a file name is changed, be sure the type of symbol matches the type of layer you have selected. Right-click the label below the symbol to select the type of layer to draw (FILL, LINE, POINT).
You can remove a layer from the list by clicking the X button to the right of the layer you want to delete:
After the initial map has been drawn you can change the layer order, color settings, coverage study signal levels, and other map features.
|
|
Copyright 2004 by SoftWright LLC