Transparent Coverage Levels
Q: How do I show only the areas where I have coverage and not the areas where I don’t?
A: You can make one or more levels of a coverage layer transparent.
Note that all values in this example are for demonstration purposes only. You should determine appropriate settings for your application.
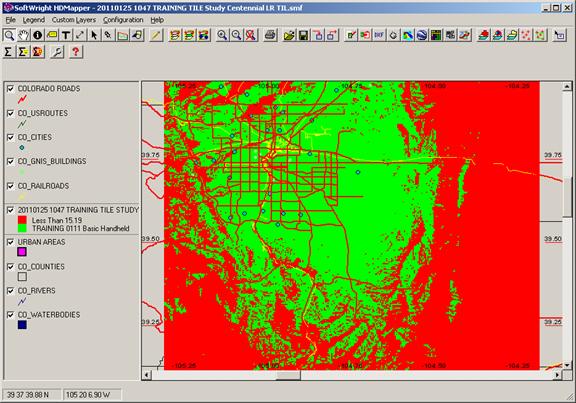
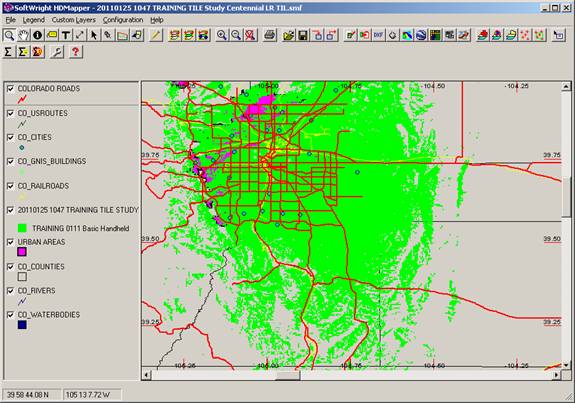
For example, suppose you have computed the desired coverage in an area with HDCoverage. By default, when you draw the coverage in HDMapper the areas that meet the specified required field level for service are shown in green, and the areas that are below that level are shown in red:
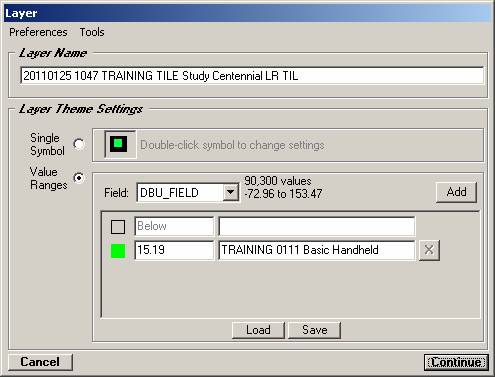
If you want only the area of adequate coverage to show you can change the other areas to a transparent fill. Double click the legend entry for the coverage layer. The Layer form is displayed. Double-click the color fill icon for the layer you want to make transparent.
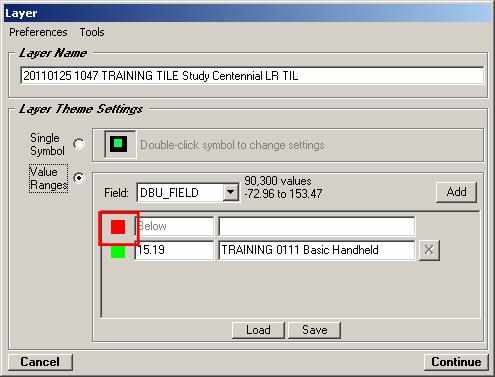
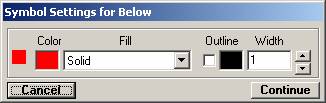
The “Symbol Settings” form is displayed.
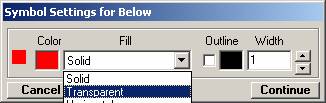
Use the pulldown list to select “Transparent” as the fill type, and click the Continue button.
Click the Continue button on the Layer form.
Now only the coverage area is shown on the map.
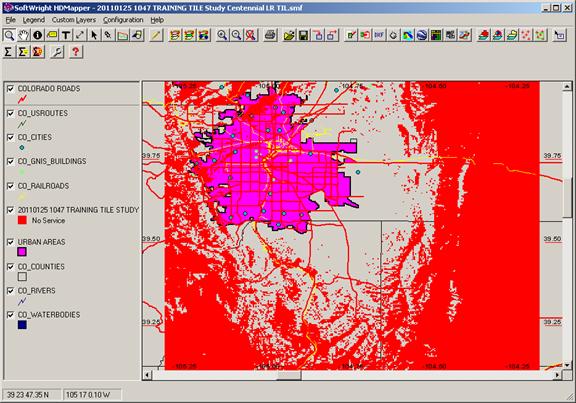
On the other hand, if you want to show only the areas where service is not available you can make change the settings:

This will emphasize the area where service needs to be improved:
|
|
Copyright 2011 by SoftWright LLC