Q: How can I edit a Land Use file to change the classification code in a rectangular area without manually editing all the points?
A: In TAP 4.4 and later, the Land Use Editor includes a function to specify the latitude and longitude limits of a rectangular area, and a classification code for the land use to be used for that area.
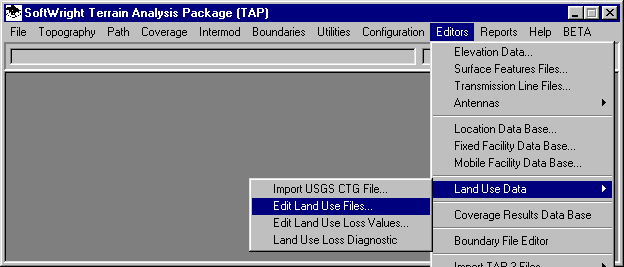
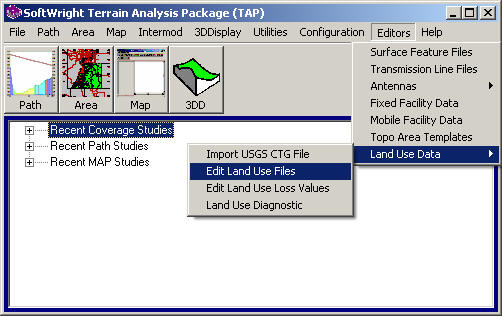
From the TAP menu, click Editors, then select Land Use data, then Edit Land Use Files.
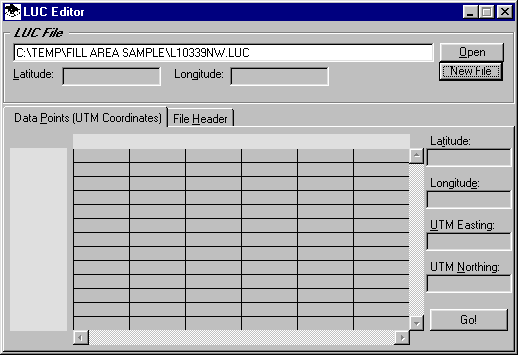
When the LUC Editor form is displayed, click New File to create a new Land Use file.
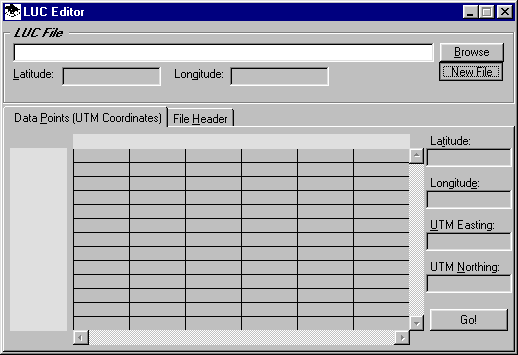
(You can also select an existing file to edit. You should make a backup copy of the existing file first.)
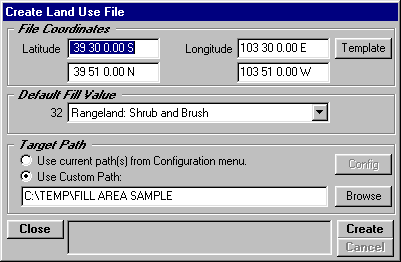
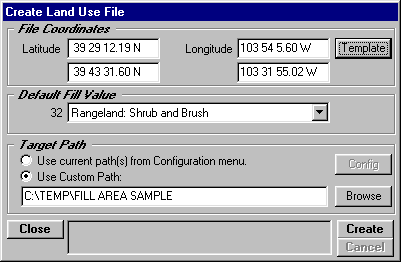
If you are creating a new file, the Create Land Use File form is displayed.
You can specify any coordinates in the area and the program will determine the correct Land Use data file to create.
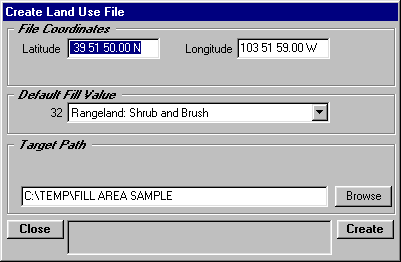
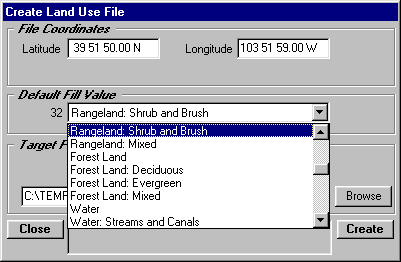
Select the default fill value to be used in the new file. The file will be created with this land use classification at all locations.
Select the path where you want to write the Land Use file:
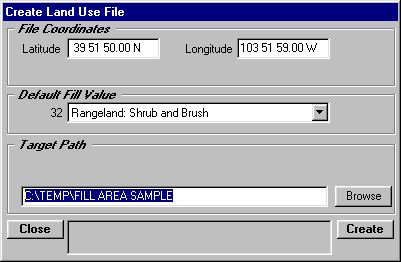
Click the Create button to create the file. When the file has been created, click the close button to return to the LUC Editor.
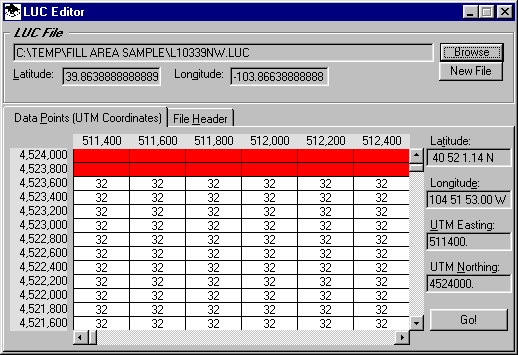
You can Open the file to see the specified Land Use classification value has been used to fill the entire file:
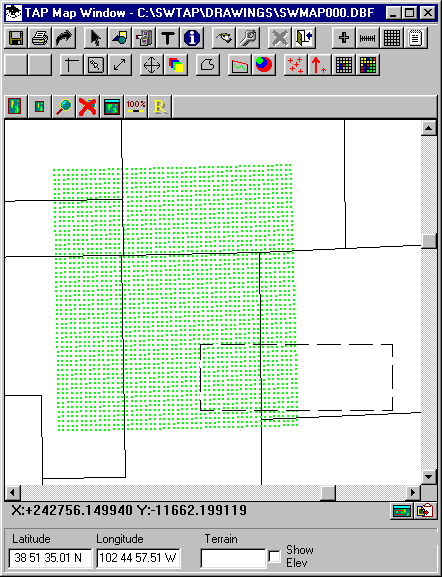
You can use the TAP Map Window to view the results graphically.
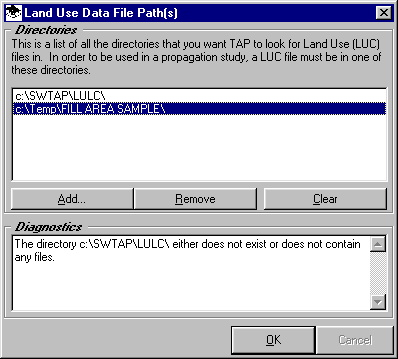
First, be sure that the path where the new file was created is included in the Land Use Data under the Configuration menu:

When the Land Use Data File Path(s) form is displayed, be sure the list includes the path for the file you just created:
Click OK to close the form.
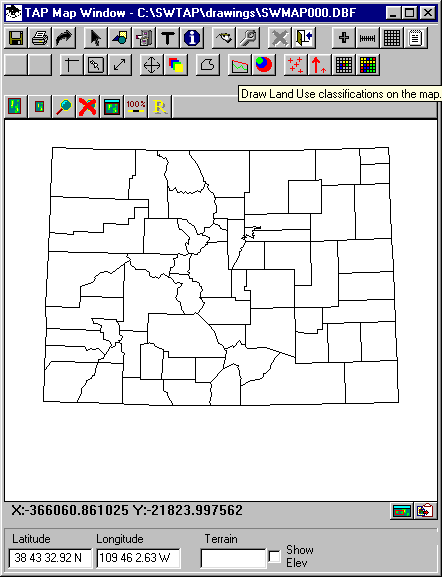
From the TAP menu, use the File | New Map function to draw a map of the area, such as Colorado in this example:
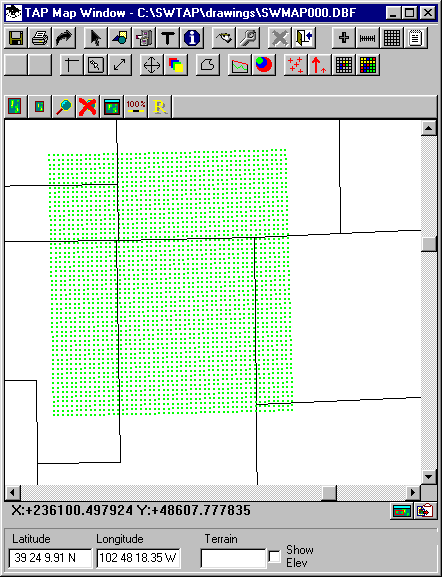
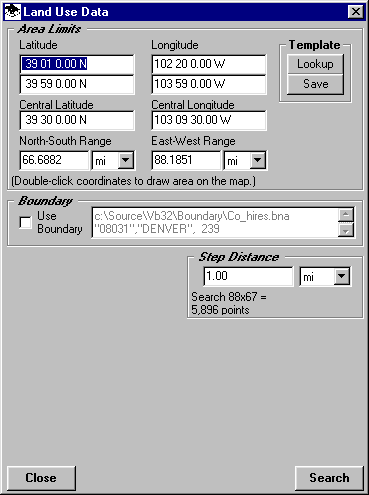
Click the Land Use button on the Map Window toolbar. When the Land Use Data form is displayed, enter the coordinates of the area for the file just created as shown:

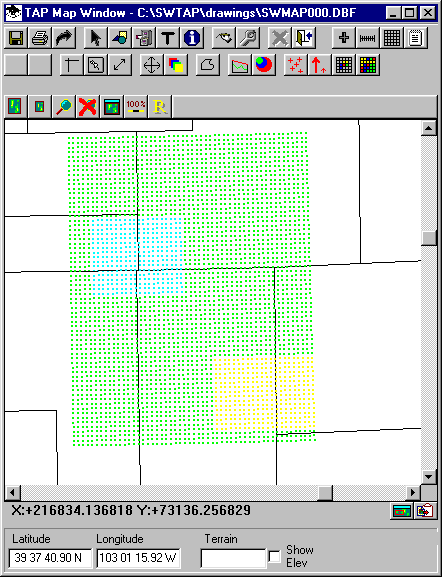
Click the Search button to find the Land Use data and draw it on the map:
You can use the magnifying glass button on the Map Window toolbar to zoom into the area:
You can also use the Map Window to define areas graphically so we can use that rectangle to fill a different value into the Land Use file.
On the Land Use Data form, double-click the Latitude box to select an area graphically.
The program will prompt you to mark an area with the mouse.
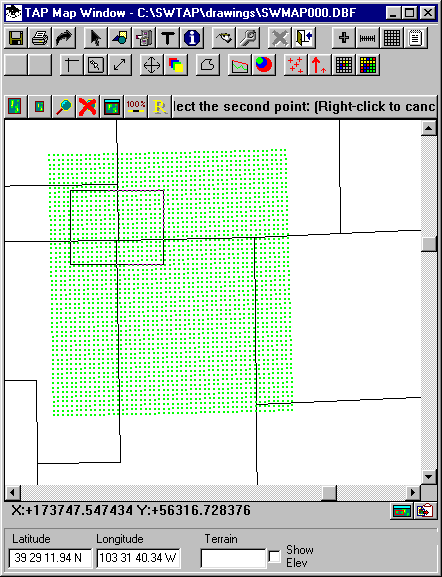
When you have clicked the two corners with the mouse, the new latitude and longitude limits will be displayed on the Land Use Data form:
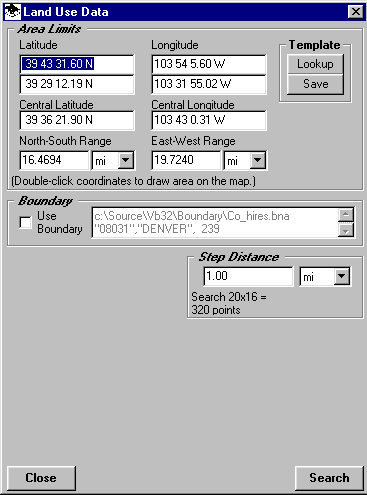
To facilitate using these coordinates later you can save the values to an area template. In the Template section in the upper right corner of the form, click the Save button.
You will be prompted for a description for the template to be used later when you want to lookup these coordinates:

Enter a description and click the Save button.
If you want to define another area, double-click the Latitude value again to mark a new area on the map. (If you know the coordinate limits of an area you want to use to fill the Land Use file, you can also enter the values manually.)
Use the mouse to define another area:
Enter another template description.

With the area templates defined, close the Map Window.
Return to the Land Use Editor from the Editors menu:
Open the file created earlier:
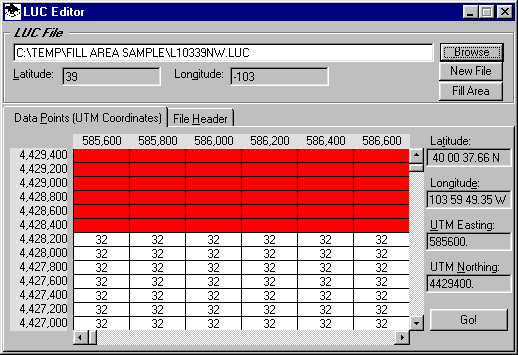
Click the Fill Area button to change the Land Use classification values in an area of the file.
When the Create Land Use File form is displayed, you can enter the latitude and longitude limits manually, or you can use the area template database for the values.
Since the templates have been created, click the Template button.

When the Template Lookup form is displayed, use the Find button to find the "Fill LU Sample Area 1" template.
Click the Close button to bring these coordinate values back to the Create Land Use File form:
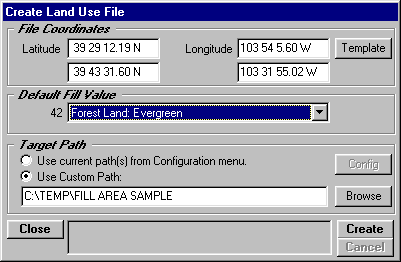
Now select the Land Use Fill Value to be used in this area:
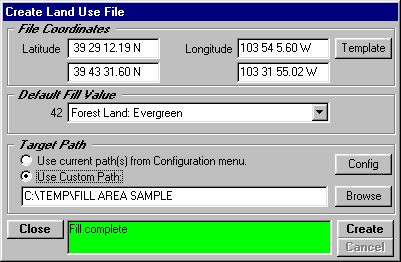
Click the Create button to fill the area with this new value.
When the fill process is complete, you can click the Template button again to find the second area template defined earlier. When the Area Template is closed, those coordinates will be filled in on the Create Land Use File form.
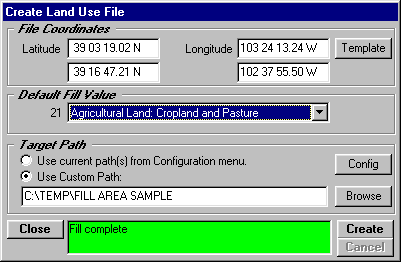
Select the Land Use Fill Value for this area and click the Create button.
When the fill process is completed, click the Close button on the Create Land Use File form, and then close the LUC Editor form.
Now you can draw another Colorado map and click the Land Use button:
Be sure to limit the area limits on the form to the area under consideration. If the default values on the form are the entire map, the program will take a considerable time to search for the Land Use files for the entire state.
When the coordinates are set as desired, click the Search button.
The filled areas area shown on the map:
The modified Land Use files can be used in propagation studies and other parts of the TAP software.
|
|
Copyright 2001 by SoftWright LLC