
Circle Segments in HDMapper™
Q: How can I draw a protected area as circle segments at different distances in TAP?
A: With TAP6.0.2376 or later and a Maintenance Subscription date of February 28, 2011, or later, you can use the ShapeMaker function in HDMapper to draw segmented circles.
Note that all values in this example are for demonstration purposes only. You should determine appropriate settings for your application.
This article describes a function to create customized map layers as shapefiles. If the area you need to draw (such as an interference restriction, a police precinct, a fire protection district, or other custom area) is available as a shapefile from other sources (such as a GIS department in your organization) you can use the Add Layer function in HDMapper to load the area as a layer.
If the area needed is not already available as a shapefile, use ShapeMaker function in HDMapper. This article contains two examples:
Suppose you need to draw a radius of 20 miles between azimuths 45 and 135 from the Castle Rock Demo site (the site and the specifications are completely hypothetical for the purpose of this illustration).
With a map displayed in HDMapper, click the “Create Drawing Layer” button to use the ShapeMaker function:
Shapefiles can contain either points (each object consisting of a single coordinate pairs of latitude and longitude), lines (each object consisting of two or more coordinate pairs), or polygons (each object consisting of four or more coordinate pairs, with the last set at the same location as the first, “closing” the polygon). Select the Polygon object type for a circle or circle segment:

Click the Continue button.
The ShapeMaker function will create a shapefile for the object you define. Enter a file name for the shapefile and click the Save button:

The default location will be the “SHAPEMAKER FILES” folder in the SHAPEFILES folder where TAP is installed. Note that after you create a shapefile with ShapeMaker, the file can be used in any other mapping program compatible with the ESRI .SHP format.
The Polygon Points form is displayed. This form can be used for numerous ShapeMaker functions. For this example, click the “Draw a Circle” button.

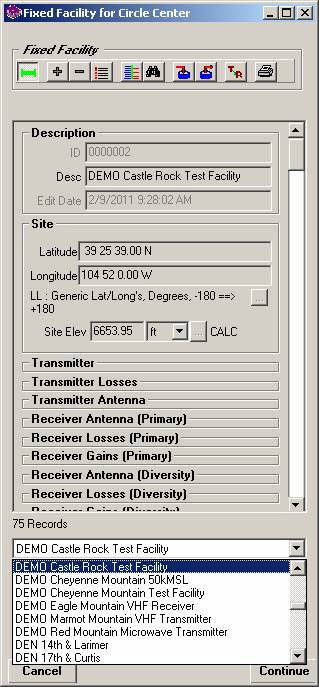
The “Circle Shape” form is displayed. You can enter coordinates manually on the form, or you can use the “Point from Map” button to get the coordinates of a point you click with the mouse. For this example, we will use the “Fixed Facility Lookup” button, since the site we want is in the TAP Fixed Facility database:

The Fixed Facility lookup form is displayed. Use the pulldown list to select the desired site and click the Continue button:
The site coordinates are returned to the Circle Shape form.

Enter the desired radius distance and the azimuth start, stop, and step (increment) values for the area you want:

Note that with earlier versions of TAP, the "Az Start" and "Az Stop" values are fixed at 0 and 360, respectively, and cannot be edited, since those versions only supported drawing complete circles, and not the circle segments. The segmented capability is available in TAP6.0.2376 or later and a Maintenance Subscription date of February 28, 2011, or later.
Click the Draw button on the Circle Shape form. The coordinates for the points will be added to the list on the Polygon Points form:

To see the current state of the polygon, click the “Refresh map sketch” button on the Polygon Points form:

Note the polygon has not been written to a shapefile yet, just a preliminary sketch has been drawn on the map.
If you want to include the transmitter site as part of the polygon, click the “Fixed Facility Lookup” button on the Polygon Points form to add that coordinate pair to the polygon:

The Fixed Facility lookup form is displayed. Use the pulldown list to select the desired site and click the Continue button:

The site coordinates are added to the polygon points:

To complete the polygon, click the “Close Polygon” button on the Polygon Points form:

The polygon will be closed by connecting the list of points back to the starting location.

If the sketch of the area on the map appears correct (use the Refresh button if necessary), click the Save button to save the area to a shapefile:

You will be prompted for a description for the object:

The shapefile will be saved and added as a layer to the drawing.

As with other layers in HDMapper, you can change the fill, color and other properties of the objects on the layer.

For this example, suppose
you need to draw an area as follows:
From Azimuth 315 to Azimuth 45, a radius of 20 miles (the northern
segment)
From Azimuth 45 to Azimuth 315, a radius of 40 miles (the southern
segment
As in the Single Segment Example above, start with a map in HDMapper, and use the Create Drawing Layer button to start the process:

Select the Polygon object type:
Specify the file name for the shapefile to create:

On the Polygon Points form, click the Draw a Circle button

On the Circle Shape form, enter or lookup the coordinates to be used as the center of the segments.

The “northern” segment in this example will need to be drawn two parts – from azimuth 315 to azimuth 360, then from azimuth 0 to azimuth 45. The numerical discontinuity between azimuth 360 and azimuth 0 requires separate segments.
First draw the segment from 0 to 45, at a distance of 20 miles as specified for the example:

The first segment will be added:

As long as the segments are drawn sequentially you can start with any location.
Next, draw the “southern” segment. Click the Draw a Circle button on the Polygon Points form:

Add a 40 mile radius from azimuth 45 to 315:

That segment is added to the polygon sketch (use the Refresh button if needed):

Use the Draw a Circle button on the Polygon Points form to add the last part of the “northern” segment:

That segment has a radius of 20 miles, from azimuth 315 to azimuth 360.

The final segment is added:

Click the Close Polygon button on the Polygon Points form to ensure that the polygon is closed:

Click the Save button on the Polygon Points file to save the object to the shapefile:

Enter the desired description for the area object:

The Area will be added to the shapefile and the layer will be displayed in HDMapper. As before, you can customize the color, fill type, and other properties of the object in the layer:

|
|
Copyright 2011 by SoftWright LLC