TAP Demo Files
Q: How can I restore the demo files for TAP so I can run the examples in the Tutorial?
A: The demo files supplied with TAP enable you to easily follow and run the examples in the Demo Quick Tour and the TAP6 Tutorial. These guides are designed to help you become familiar with the software, and the necessary files are included in the TAP installation. If you are a new TAP user, perhaps replacing a previous user who deleted the demo information, this article will help you replace the information for running the samples.
Note that all values in this example are for demonstration purposes only. You should determine appropriate settings for your application.
If the topographic elevation data files for the TAP Demo area (near metro Denver) have been removed from your TAP installation, or if the Demo facility records have been deleted from the Fixed or Mobile Facility databases, you can download a file from our ftp site: DemoRefresh.zip
After you have downloaded the file, unzip it into the folder where TAP is currently installed, then follow these steps:
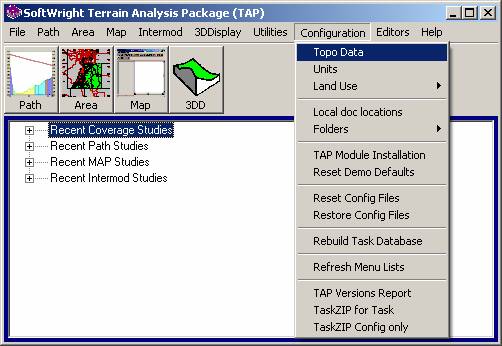
1. Run the Topo Data Index function. Select Configuration-TopoData from the TAP6 menu:
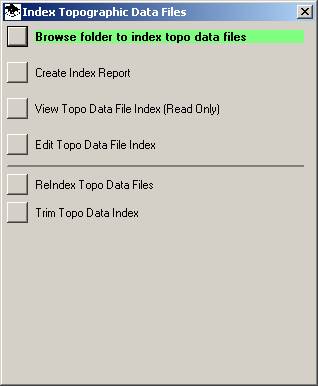
2. On the Index Topographic Data Files form, click the “Browse folder…” button.
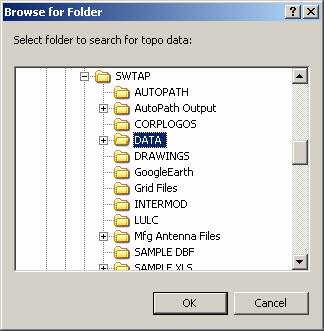
3. Find the DATA folder in the directory where TAP is installed, and click the OK button to index the new elevation data files:
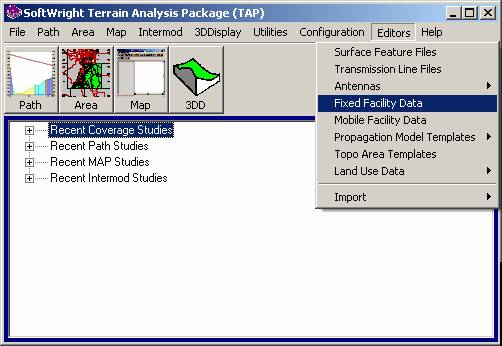
4. If the DEMO facilities are not in your Fixed Facility database you can import the records. (If the facilities are still present in your Fixed Facility database, such as “DEMO Castle Rock”, “DEMO Cheyenne Mtn”, etc., you should not import the new records. No harm is done if you do, but multiple records with the same descriptions may cause confusion. If the records are present in the database but they have been changed and no longer match the QuickTour or Tutorial values, you can delete the existing DEMO records from the database and then import the new records.) To import the records, in the Editors menu click “Fixed Facility Data”
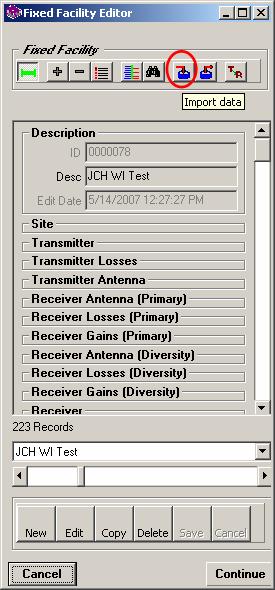
5. The Fixed Facility Editor is opened. Click the Import Data button:
6. On the Import Fixed Facility form, click the Browse (“…”) button to find the file to import:

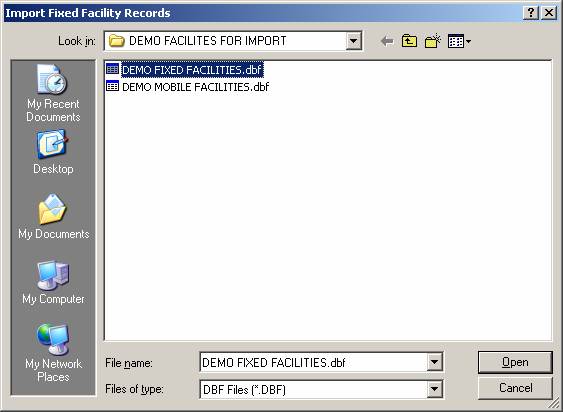
7. Navigate to the “DEMO FACILITIES FOR IMPORT” folder (this folder was created where TAP is installed when you unzipped the downloaded file). Select the “DEMO FIXED FACILITIES.DBF file an click the Open button:
8. On the Import Fixed Facility form, click the Import button.

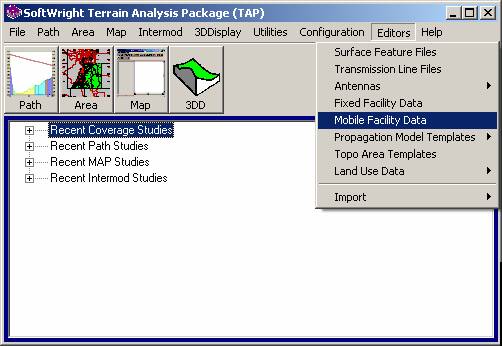
10. If the DEMO mobile facilities are not in your Mobile Facility database you can import the records. (If the facilities are still present in your Mobile Facility database, such as “SAMPLE Handheld”, you should not import the new records. No harm is done if you do, but multiple records with the same descriptions may cause confusion. If the records are present in the database but they have been changed and no longer match the QuickTour or Tutorial values, you can delete the existing SAMPLE records from the database and then import the new records.) To import the records, in the Editors menu click “Mobile Facility Data”
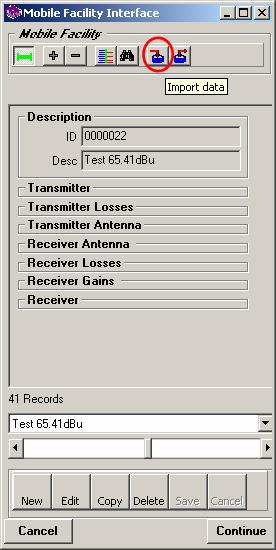
11. The Mobile Facility Editor is opened. Click the Import Data button:
12. On the Import Mobile Facility form, click the Browse (“…”) button to find the file to import:

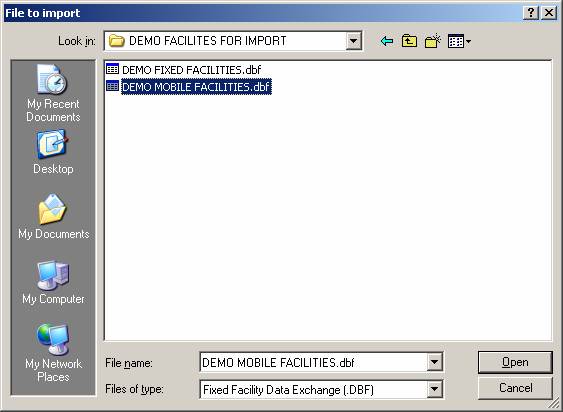
13. Navigate to the “DEMO FACILITIES FOR IMPORT” folder (this folder was created where TAP is installed when you unzipped the downloaded file). Select the “DEMO MOBILE FACILITIES.DBF file an click the Open button:
14. On the Import Mobile Facility form, click the Import button:

15. Close the form after the records are imported.
Now you should be able to follow and run the samples in the Demo Quick Tour and the TAP6 Tutorial. If you need more help, please contact SoftWright support.
|
|
Copyright 2008 by SoftWright LLC