Receiver Rejection Specifications
SoftWright Home
Q: How can I enter the adjacent channel rejection specifications for my receiver to be used in an interference study?
A: With TAP6.0.2433 or later, the TAP Adjacent Channel Interference module, and a Maintenance Subscription date of January 31, 2012, or later, you can enter and save templates of the receiver rejection specifications for co- and adjacent-channel frequencies.
Note that all values in this example are for demonstration purposes only. You should determine appropriate settings for your application.
The TAP Adjacent Channel Interference module enables you to create a template that describes the receiver rejection characteristics of co-channel and adjacent channel signals and to define the required Desired to Undesired (D/U or D to U) ratio (in dB) to ensure proper operation of the receiver with the desired signal.
The TAP Adjacent Channel Interference module includes the following benefits:
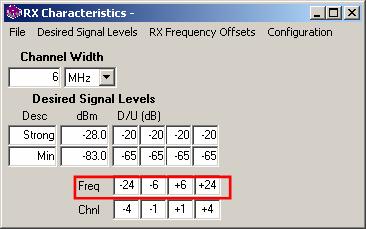
· You can define as many offset channel frequencies as you want. Typically these are defined by plus or minus channel increments from the desired signal carrier.
· You can define different D/U ratio requirements for different levels of the desired signal. For example, a very strong desired signal level at a particular location may mean that the D/U ratio for successful operation of the receiver can be considerably lower than the D/U ratio for a marginal or weak desired signal level. You can define as many desired signal levels as you want. Typically these levels are identified with a label (“Strong”, “Moderate”, “Weak”, “Minimum”, etc.) as well as the numerical receiver input power level they represent (in dBm).
· You can define as many “templates” for receivers as you need. These templates enable you to enter the values and save them, then to use any desired template to represent different conditions, different receiver hardware, etc.
With the RX Rejection Template interface you can create and edit templates:
For these examples, the Receiver Rejection Templates will be opened through the Utility menu in TAP. The same functions can be found in other parts of TAP as well.
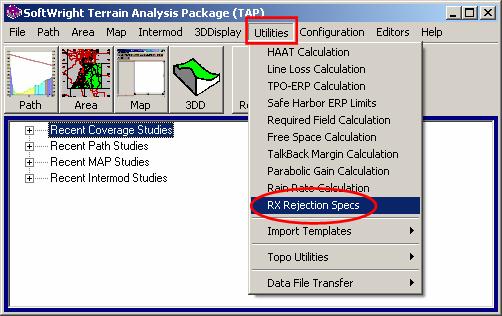
From the TAP menu, click the Utilities menu, then select RX Rejection Specs:
A form is displayed to select the desired template.

To create a new Template from the selection form, select a blank entry, or the “[New Template]” option:
To create a new template for a receiver rejection specification, with the blank line selected on the selection form, click the Browse (“…”) button:

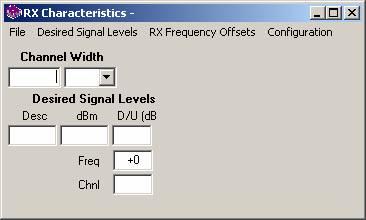
The RX Characteristics form will be displayed with no entries:
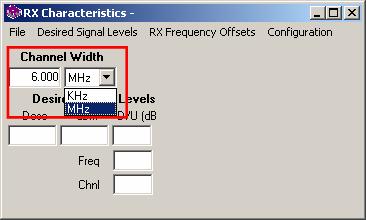
Select the units (KHz or MHz) for the channel and enter the numeric value of the channel width.
Note that the template does not contain information about absolute frequency values but rather the offset values relative to the center carrier frequency of the Desired signal.
Note that you must enter the Channel Width value and units before adding channel offset values.
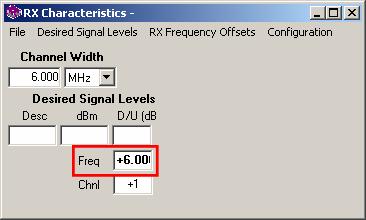
The RX Characteristics form initially contains boxes for one Desired signal level and one frequency offset. You can enter values into those boxes:
For example, you can enter a value for the first adjacent channel above the Desired signal by entering a “1” in the Chnl box:
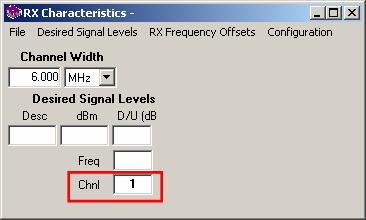
When you move the cursor out of the Chnl box, the frequency offset value will be displayed:
To add channel offsets to the template, use the RX Frequency Offsets menu and click Add Offset:
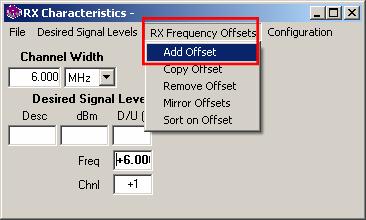
A new channel offset column will be added, and the channel value incremented by one, and the computed frequency offset displayed.
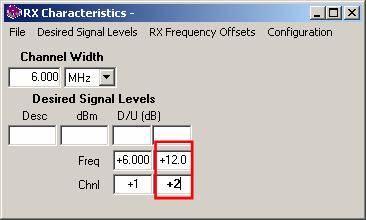
If the channel and frequency offset values are not the values you need for this template, edit the Chnl value:
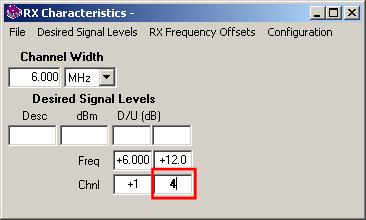
When you move the cursor out of the Chnl box, the frequency offset value will be displayed:

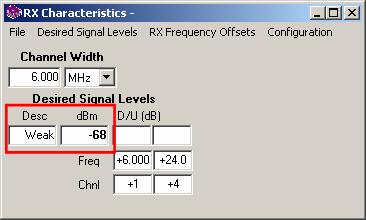
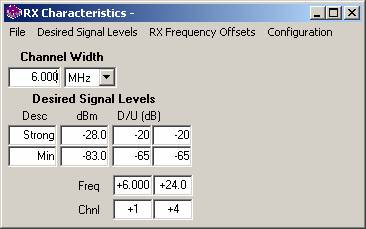
The RX Characteristics form initially contains boxes for one Desired signal level. You can enter values into those boxes.
Begin by entering a description for the level of Desired signal and the corresponding input power level (in dBm):
Then you can enter the required Desired to Undesired (D/U) ratio (in dB) for each channel offset value.
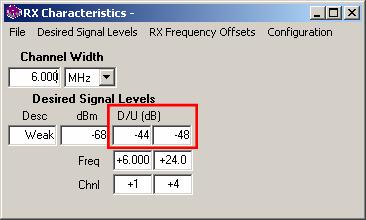
Note that all values in this example are for demonstration purposes only. You should determine appropriate settings for your application.
To add Desired signal levels to the template, use the Desired Signal Levels menu and click Add D Level:
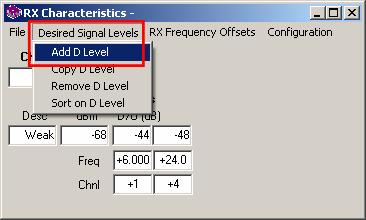
A new Desired signal level row will be added.
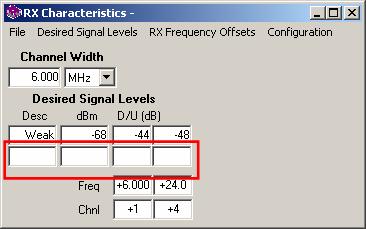
Enter the Description, input power level (in dBm) and the Desired to Undesired (D/U) ratio (in dB) for each frequency offset value:
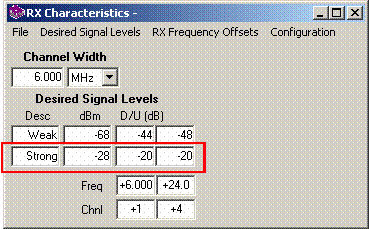
At times it may be convenient to copy a channel offset column (for example, if several of the values are the same for another offset).
To copy a channel offset column, place the cursor in any box in the column (the text of the box will display with a bold font. Then in the RX Frequency Offsets menu, click Copy Offset:
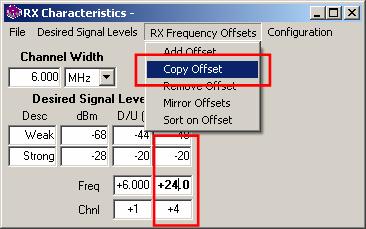
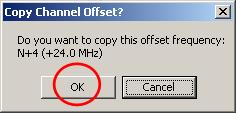
A confirmation dialog box is displayed. Click OK to copy the column.
The column will be duplicated in the template:
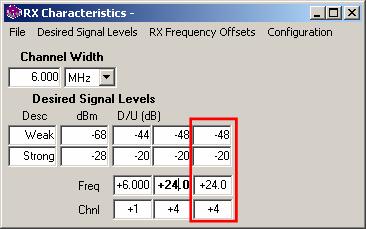
Now you can edit the values (especially the channel) in the column:
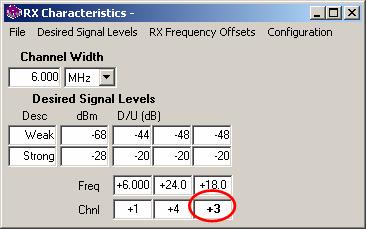
At times it may be convenient to copy a Desired signal level row (for example, if several of the values are the same for another signal level).
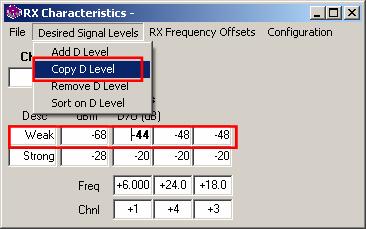
To copy a Desired signal level row, place the cursor in any box in the row (the text of the box will display with a bold font. Then in the Desired Signal Levels menu click Copy D Level:
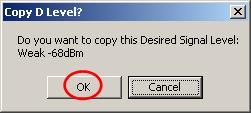
A confirmation dialog box is displayed. Click OK to copy the row:
The row will be duplicated in the template:
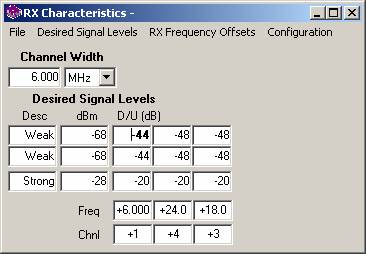
Now you can edit the values (especially the description and dBm power level):
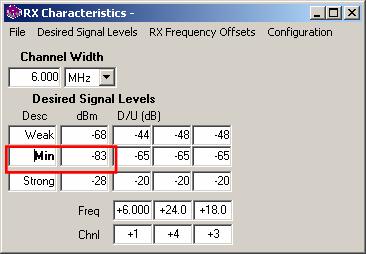
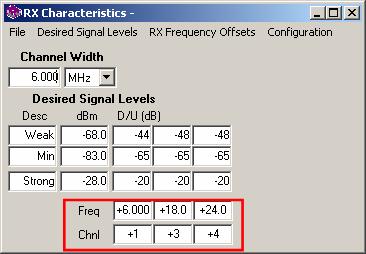
You can sort the template values to display the channel offsets in ascending order.
To sort by channel offset, in the RX Frequency Offsets menu, click Sort on Offset:
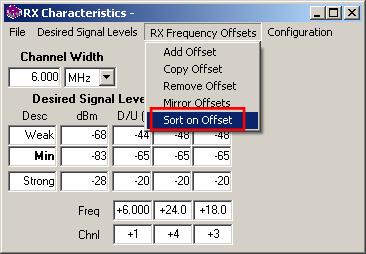
The channel offset columns will be organized in ascending order:
You can sort the template values to display the Desired signal input power levels in descending order.
To sort by Desired signal level, in the Desired Signal Levels menu, click Sort on D Level:
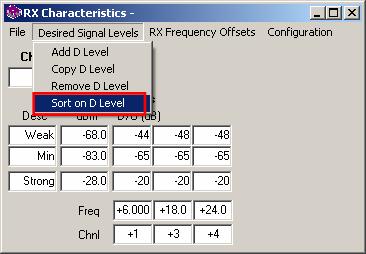
The Desired signal level rows will be organized in descending order:

To remove a channel offset column from the template, place the cursor in any box in the column (the text of the box will display with a bold font). Then in the RX Frequency Offsets menu click Remove Offset:
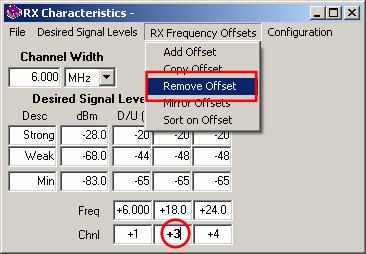
A confirmation dialog box is displayed. Click OK to delete the column.
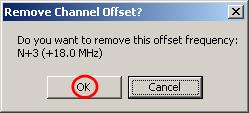
The column is removed from the template.
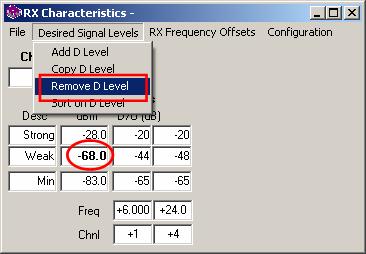
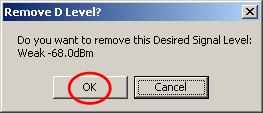
To remove a Desired signal level row from the template, place the cursor in any box in the row (the text of the box will display with a bold font). Then in the Desired Signal Levels menu click Remove D Level:
A confirmation dialog box is displayed. Click OK to delete the row:
The row is removed from the template:
Receiver characteristics may be symmetrical about the center frequency. The D/U ratio for different Desired signal strengths is the same for the first adjacent channel above and below, etc.
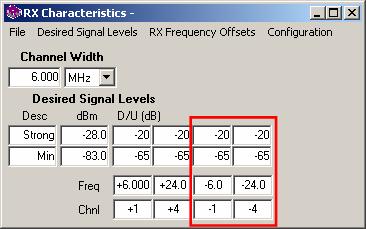
If you have entered the characteristics for the adjacent channels above you can create the identical characteristics for the “below” adjacent channels using the “mirror” function. From the RX Frequency Offsets menu, click Mirror Offsets.

The “mirrored” offsets will be created.
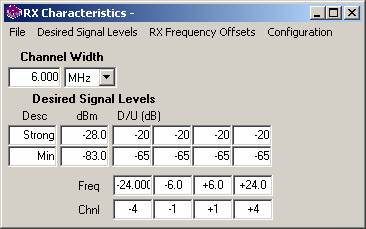
Then you can use the Sort on Offset function to order the template by channel offsets:
The configuration of the form can be changed.
The width of the D/U boxes can be adjusted. This may be useful for templates with a large number of offsets. In the Configuration menu click D to U text Width:
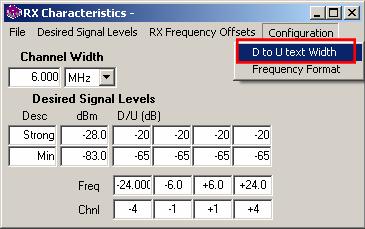
Enter the desired text width in pixels and click OK.
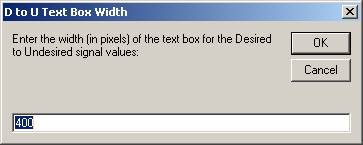
The text width will be adjusted.
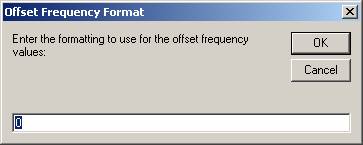
You can change the numerical formatting of the frequency values. For example, if all the channel offsets are integer values with no decimal component you can change the format to improve readability. From the Configuration menu click Frequency Format.
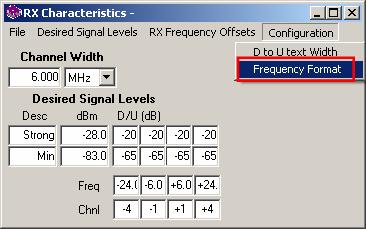
Use zeros to define the digits and decimal places to use and click OK.
The frequency values will be reformatted.
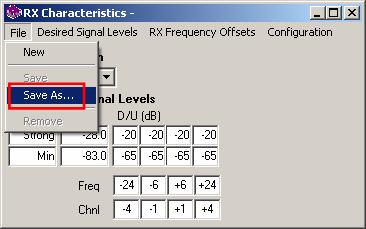
To save a new template, in the File menu click Save As
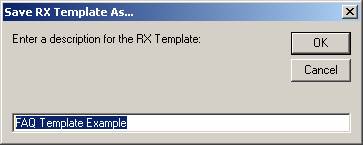
Enter a name for the template and click OK:
To save an existing template after editing, use the File-Save menu.
To open an existing template, use the pulldown list to select the template name:

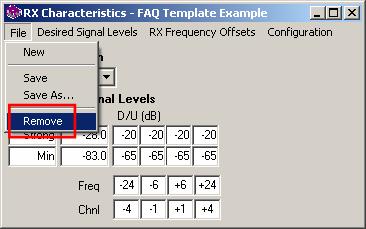
To remove a template permanently from TAP, use the File menu and click Remove:
A confirmation dialog box is displayed. Click Yes to delete the template.
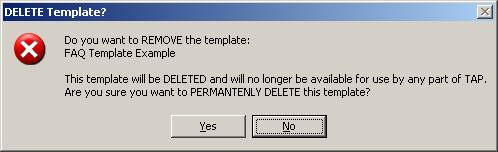
The template will be permanently removed from TAP and cannot be recovered.
|
|
Copyright 2012 by SoftWright LLC
