
Q: I need to enter elevation data along a path manually (digitized topographic data is not available for the area). I want to enter only the peaks and valley elevations, but the default file TAP creates in the Elevation Editor has uniform spacing between the points. How can I create the file I need?
A: You can create an elevation file for one or more paths from a site using the Elevation Editor. From the TAP Editors menu, select
The TAP Elevation File Editor is displayed:

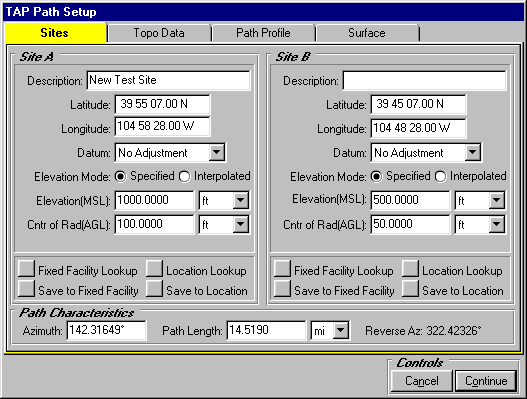
On the Site tab, enter the description and coordinate information for the starting point of the path(s) you want to enter.
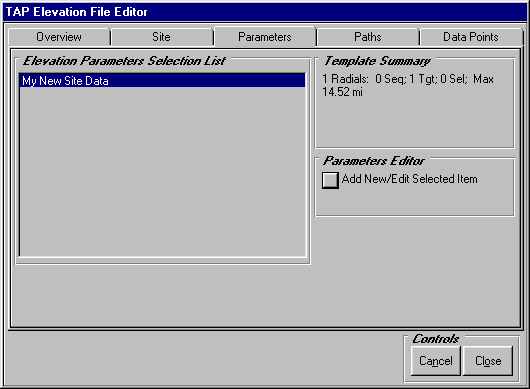
Then click the Parameters tab:
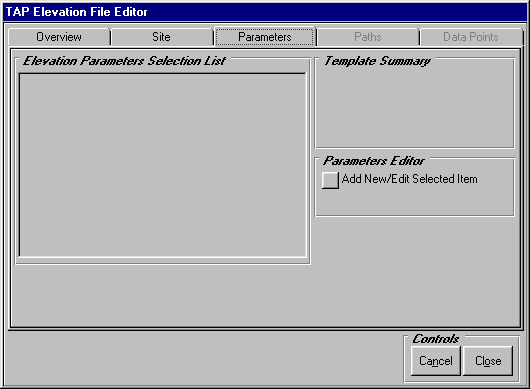
This tab shows the Elevation Data Parameters. For a new site, the list will be blank. Click the "Add New/Edit Selected Item" button to add a data specification to the list.
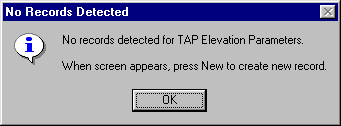
For a new site that has no Elevation Data Parameters defined, the program will display the empty database warning:
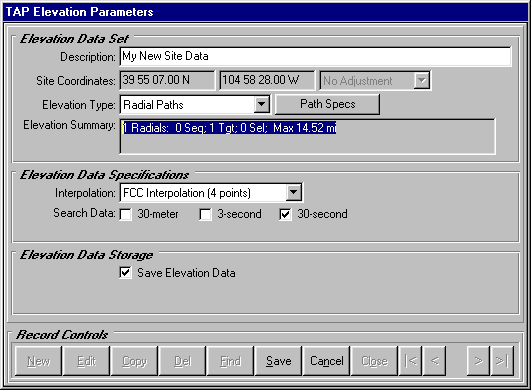
When the TAP Elevation Parameters form is displayed, click the New button to create the new elevation data set record.
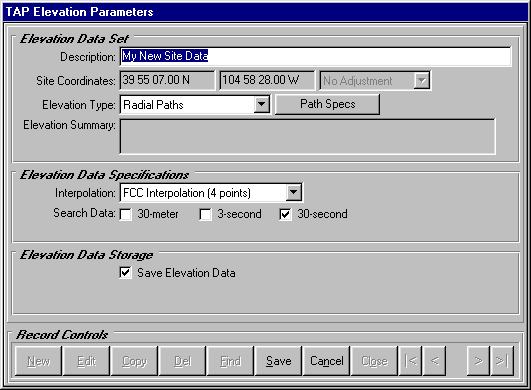
Enter a description for the data set to identify the data when you select it later in other programs. For example, you may want to include the source of the data, map types, etc.
Since this is manually entered data, some of the information on the form does not apply (such as interpolation method and data types) and can be ignored.
To specify the path(s) you want, click the Path Specs button. (Again, for a new data set, the empty database message will be displayed.)
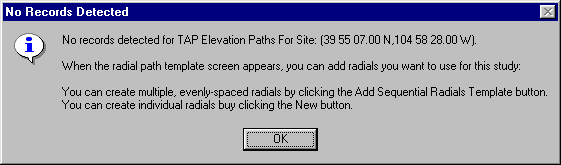
When the TAP Elevation Paths form is displayed, click the New button to create a path record:
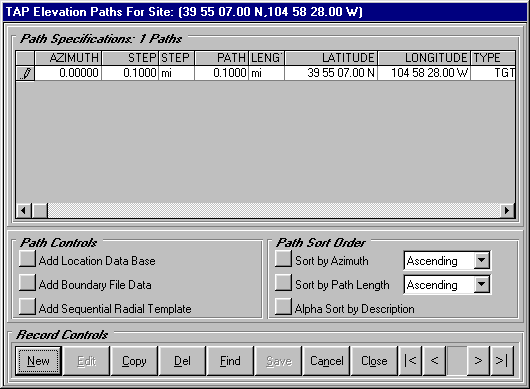
(Note there are several other ways to create a path record, such as the Location Database or sequential radials.)
You can enter the coordinates of the end point of the path you want, and the Azimuth and Length of the path will be computed and displayed:
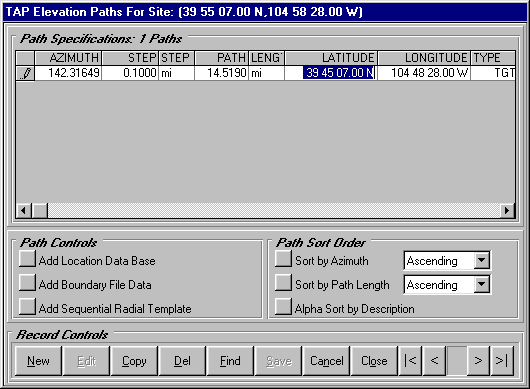
(You could also enter the Azimuth and Path Length values and the end point coordinates will be displayed.)
The default value for the step or increment between topographic elevation data points along the path is 0.1 miles (or kilometers, depending on your TAP default settings). This would result (in this example) of 145 elevation points created in the elevation data base. Since we want to enter points of arbitrary distances, change the step value to be the same as the path length value:
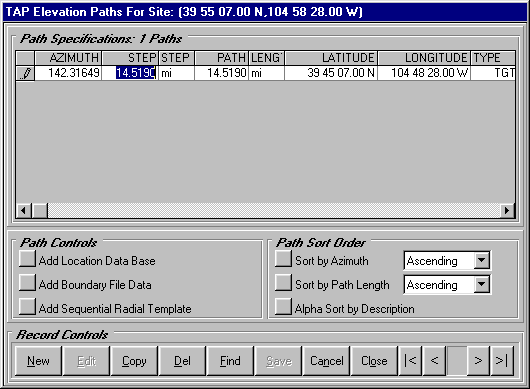
Click the Close button. This will create an elevation database for this path with two points, the beginning point and (in one "step") the ending point.
The program will return to the TAP Elevation Parameters form, showing a summary of the elevation data set you have defined.
Click the Save button, then the Close button.
Now the list of Elevation Parameters includes the new data set you have created.
With that data set selected on the list, click the Paths tab:
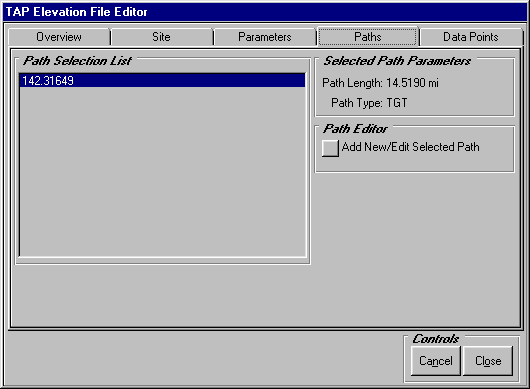
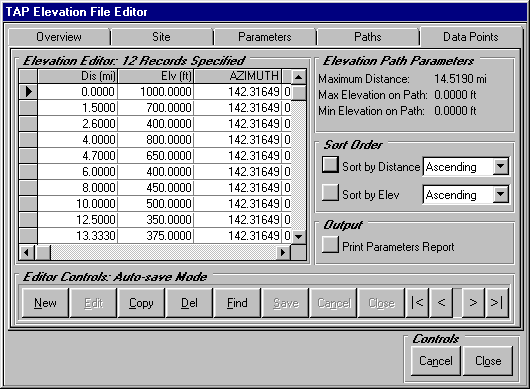
This tab on the form shows the list of all of the paths defined in the elevation data set. With the path you want selected in the list, click the Data Points tab. (Note that it may take several seconds to create the database):
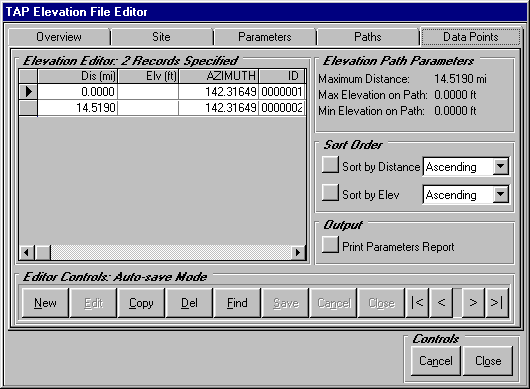
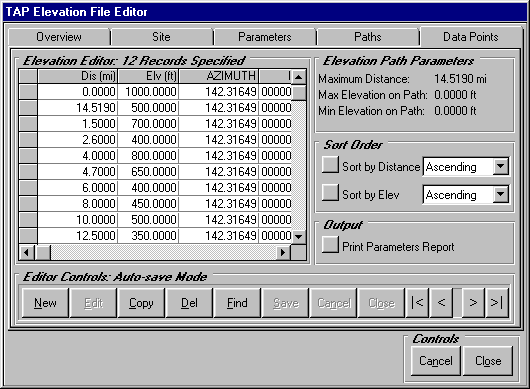
As specified, the path includes only the two end points, with no elevations specified. You can enter an elevation value for each of these points, and use the New button to add points at the desired distances and enter the elevation for each of those points.
You can use the Sort by Distance button to put the points in order of the distance along the path.
When you have completed the data entry, click the Close button.
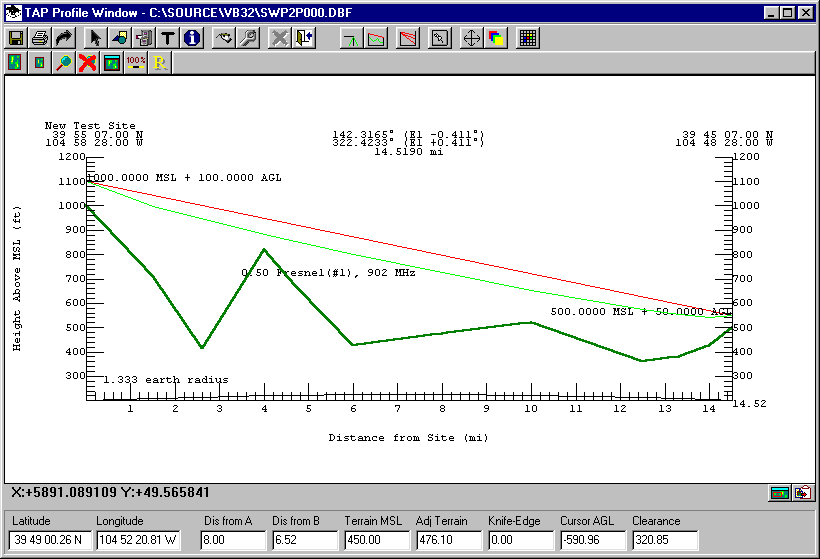
Now you can use the data to draw a profile of the path.
On the TAP Path Setup form, specify the starting point of the path.
Click the Topo Data tab:
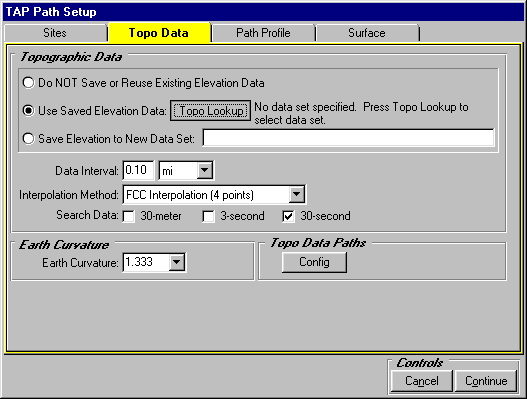
To select the elevation data set, click the Topo Lookup button. A list of all of the elevation data sets for this site is displayed. Select the elevation data set you want, and a list of the paths in that database will be displayed. Select the azimuth of the path you want to use and click the Close button.
If the coordinates of the end point of the path are different from the coordinates on the Sites tab, a warning message is displayed:

Click OK to use the coordinates in the elevation database. You will notice on the Sites tab that the Site B coordinates are updated:
Be sure both sites use Specified as the Elevation Mode, and that the site elevations are entered correctly.
Click the Continue button to draw the path profile:
Copyright 2000 by SoftWright LLC