TAP 4 Page Layout

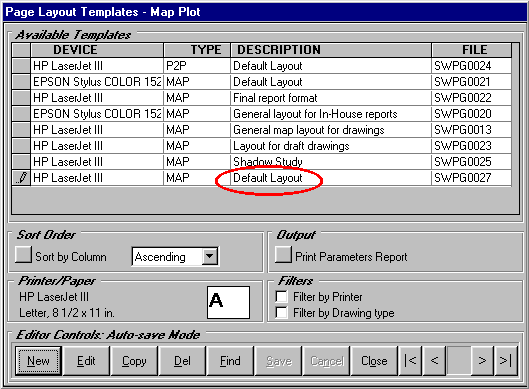
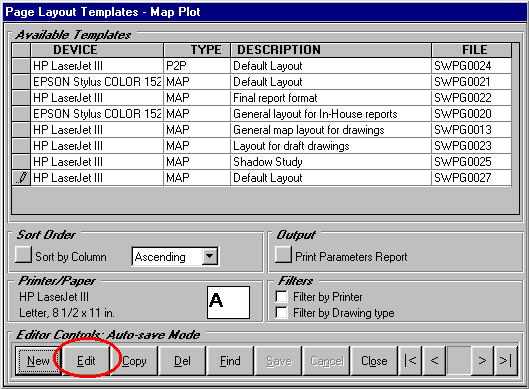
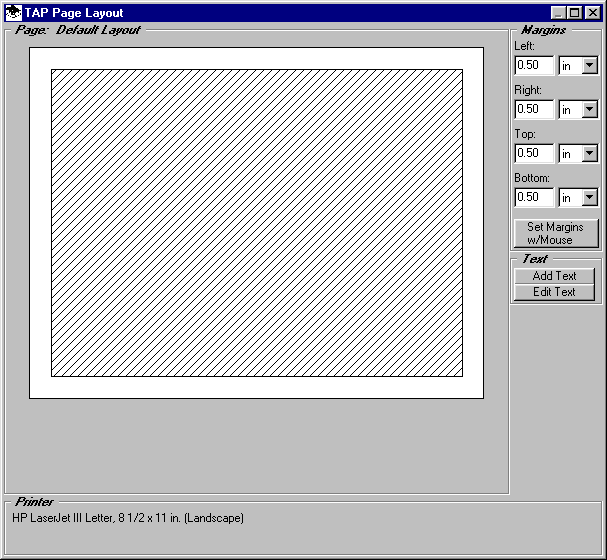
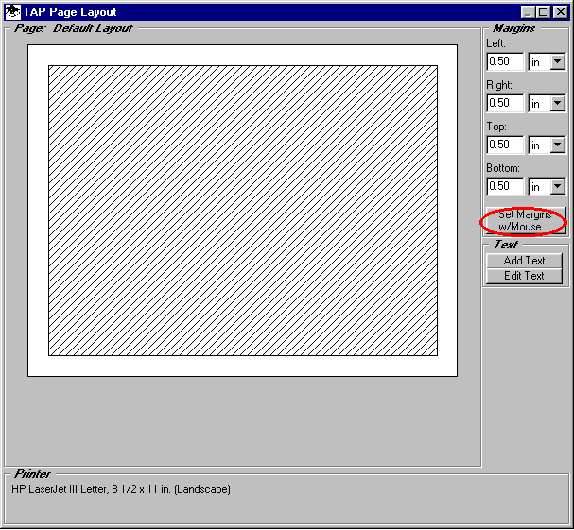
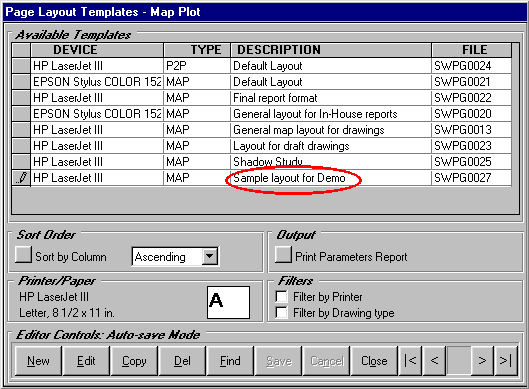
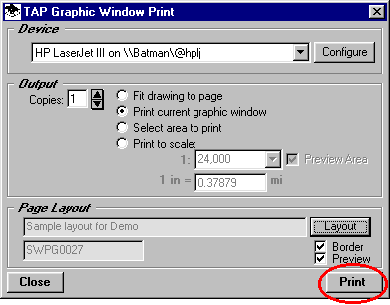
Q: How do I set up multiple page layout configurations? I want my profiles to be in "landscape" mode but coverage maps in "portrait"? Also, I may want the mode to change on a different printer.

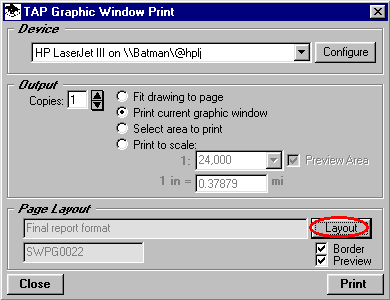
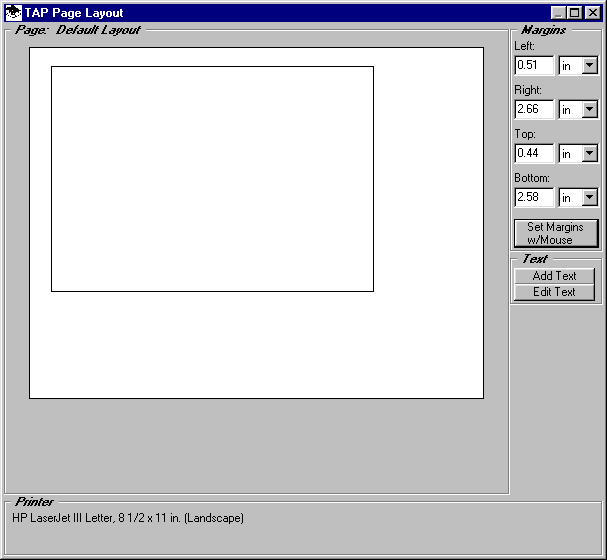
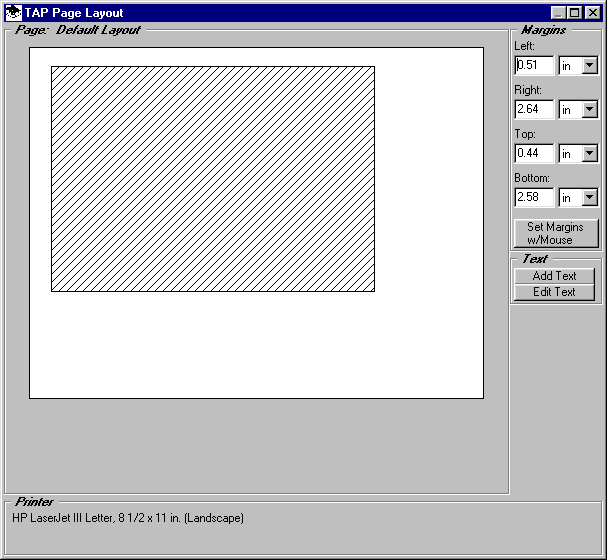
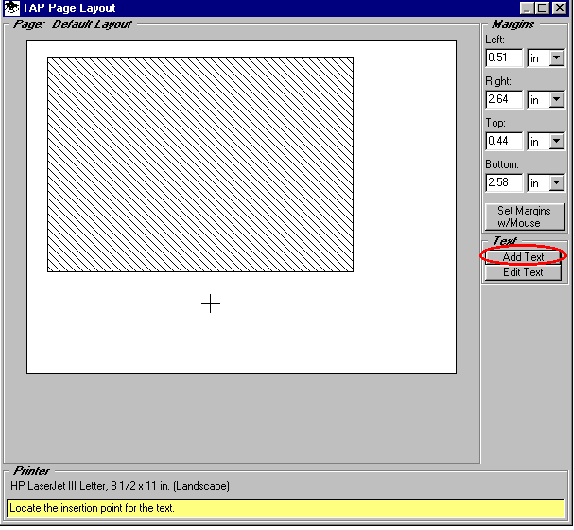
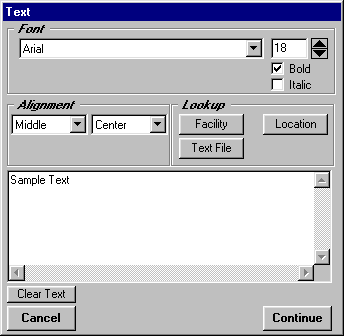
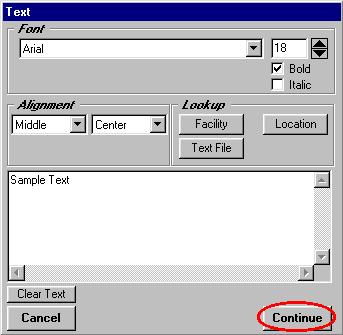
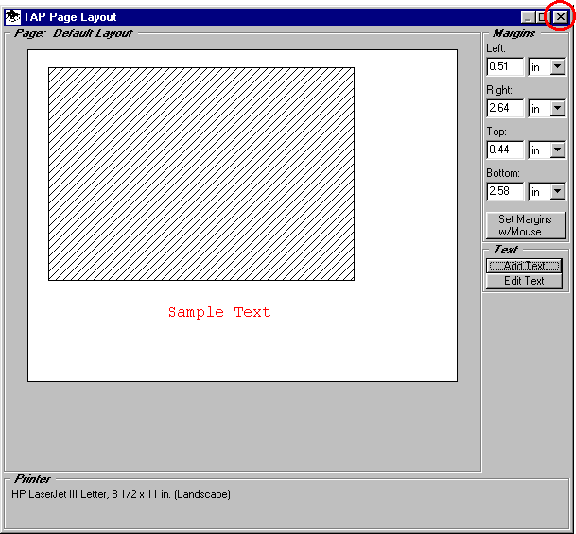
A: The page layout information is available from the TAP Graphic Window Print form.

(Note that this article describes the Page Layout functions for TAP4.  If you are using TAP5 or later, you should read the Print Preview and Page Layout article for that version.)

  1. When the graphic you want to print is displayed, click the Print button on the control form:

  2. The Graphic Window Print form will be displayed. Click the Layout button on the form.:

  3. The Page Layout Templates form will be displayed. This form displays the available page layout templates.

  4. Note that the default mode for this form is to display only those templates defined for the current printer (HP LaserJet III in the example) and drawing type (Map in the example).
  5. You can view other available templates by removing the Filter by Printer flag. This will allow the form to show all available templates for the same paper size (Letter, 8-1/2 x 11 in the example) and page orientation. (You cannot see other templates for different page sizes or different orientation. To change these settings, use the options on the Graphic Window Print form shown above to select a different printer, or to change the paper size or orientation (with the Config button on that form).

  6. You can also remove the Filter by Drawing type flag to see available templates that were defined (for the same page size and orientation) for other types of drawings. Map drawing templates are indicated by "MAP", Antenna drawing templates by "ANT", and Point to Point Profiles by "P2P"

  7. To define a new template, click the New button.
  8. A new item will be added with the description "Default Layout". (The file name is assigned automatically and cannot be changed. The description is the most convenient way to identify different templates.)

  9. To define the characteristics of the template, click the Edit button:

  10. The Page Layout form will be displayed:

  11. The white area on the form represents the current page size and orientation. The shaded area represents the graphic drawing area. The graphic you draw (a map, terrain profile, antenna pattern, etc.) will be completely contained in the graphic drawing area. You can define margins, as well as add text anywhere on the page.
  12. For example, you can type in the desired page margins, or you can define the graphic drawing area by clicking the Set Margins w/ Mouse button:

  13. You will be prompted to define the graphic drawing area. Position the mouse cursor and left-click to define one corner, then the second corner of the area:

  14. The new graphic drawing area will be displayed, as well as the new margin dimensions:

  15. You can add text to the page layout template with the Add Text button. You will be prompted to locate the position of the text on the drawing. Left click with the mouse where you want the text to be located:

  16. The Text form will be displayed:

  17. You can use this form to select the font and size of the text and the alignment of the text relative to the insertion point you defined. You can type in the text you want, or you can use the Text File button to read text from an ASCII file. You can also get coordinate, elevation, etc., information from the TAP Fixed Facility data base or the TAP Location data base using the appropriate buttons.
  18. When the text you want to add is shown, click the Continue button.

  19. The text will be added to the drawing. To edit text on the page layout template, click the Edit Text button. You will be prompted to select the text by clicking it on the drawing.
  20. To close the Page Layout form, click the "X" in the upper right corner:

  21. This will return you to the Page Layout Templates form. You can enter a description of the template for future use.

  22. Click the Close button:

  23. This will return you to the Graphic Window Print form: Click the Print button to print the current drawing with the specified page layout:

  24. If the Preview box is checked on the Graphic Window Print form, a preview of the page layout will be displayed. (If the Preview box is not checked, the preview is not displayed.)

  25. You can finish the print by clicking Print, or abandon the print by clicking Cancel:


Copyright 1999 by SoftWright LLC