Boundary File Filters
- Names
Q: I don’t want to plot the entire state boundary
file with my relatively small coverage area. How can I plot just
a part of the file with the counties I want?
A: The TAP Map Window plotting allows you to plot boundary
files you select. If you want to plot only part of a file, you
can use one of the boundary filter programs to create a new file
containing only the objects you want to plot. (With the Map Window,
you could plot the entire file, then use the zoom features to
show and print only the area of interest. However, using the
boundary filter programs will allow you to save time and disk
space for the drawing file.)
Several filter options are available, depending on what you
are trying to do. You can filter by:
Distance from a point
Latitude/longitude rectangle
An arbitrary polygon
The names of objects in the file
This document describes using the filter by names program.
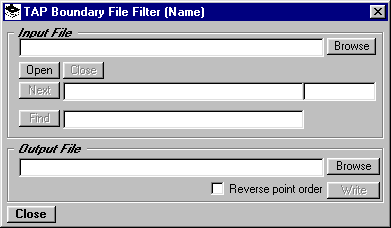
Filter by Names
Suppose you want only selected boundaries from a boundary
file. From the TAP Boundary menu, select "Filter by Name".
 This will display the Name Filter form.
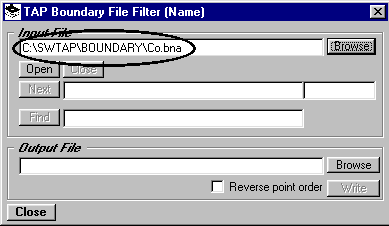
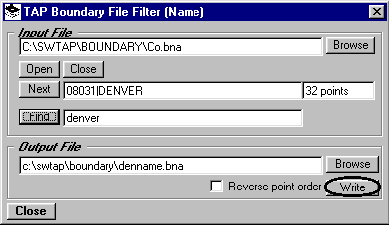
 Enter the boundary file you want to read and filter.
You can also click the "Browse" button to select a
file
Enter the boundary file you want to read and filter.
You can also click the "Browse" button to select a
file
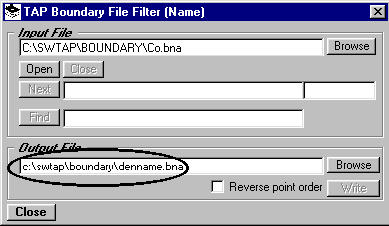
 Enter the name of an output .BNA file where you
want to write the results. (You can also use the "Browse"
button to find an existing path and/or file.)
Enter the name of an output .BNA file where you
want to write the results. (You can also use the "Browse"
button to find an existing path and/or file.)
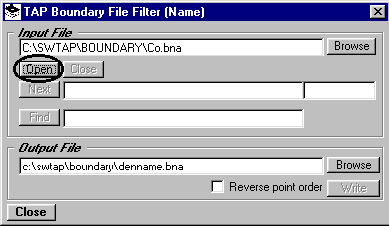
 Click the "Open" button to open the input
file.
Click the "Open" button to open the input
file.
 The first object in the file will be displayed,
showing the .BNA file Primary ID and Secondary ID, separated
by a "|" character. The number of points in the object
is also shown.
The first object in the file will be displayed,
showing the .BNA file Primary ID and Secondary ID, separated
by a "|" character. The number of points in the object
is also shown.
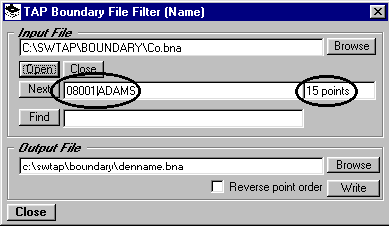 If you want to write the object shown to the output
file, click the "Write" button. For this tutorial,
click the "Write" button to include Adams county in
the output file.
If you want to write the object shown to the output
file, click the "Write" button. For this tutorial,
click the "Write" button to include Adams county in
the output file.
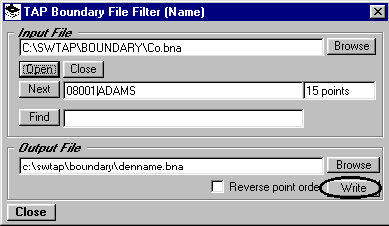 When the "Write" button is clicked, the
current object is written to the output file, and the next object
in the input file is displayed:
When the "Write" button is clicked, the
current object is written to the output file, and the next object
in the input file is displayed:
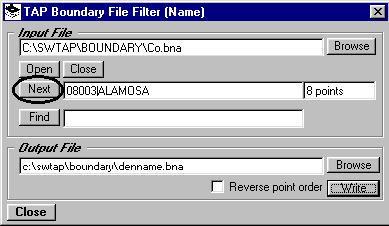
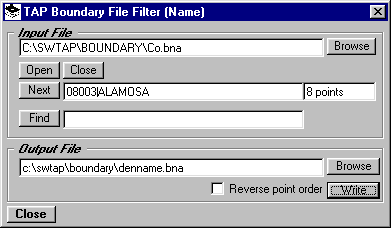 To move to the next object in the file, click the
"Next" button. For this tutorial, click the "Next"
button to skip Alamosa county and not write it to the output
file.
To move to the next object in the file, click the
"Next" button. For this tutorial, click the "Next"
button to skip Alamosa county and not write it to the output
file.
 Note that it is not possible to move backwards in the file
with this program. If you need to move to an object earlier in
the file you can click the Input File Close button (located next
to the "Open" button) to close the file, then re-open
the file. The first object in the file will then be displayed.
Note also that the order of the objects in the file is the order
displayed, not alphabetically.
Note that it is not possible to move backwards in the file
with this program. If you need to move to an object earlier in
the file you can click the Input File Close button (located next
to the "Open" button) to close the file, then re-open
the file. The first object in the file will then be displayed.
Note also that the order of the objects in the file is the order
displayed, not alphabetically.
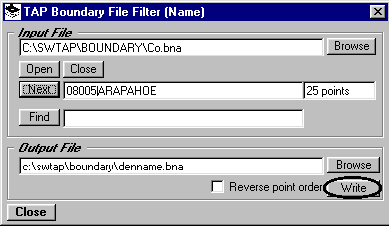
The description information for the next object
will be displayed. For this tutorial, click the "Write"
button to include Arapahoe county.
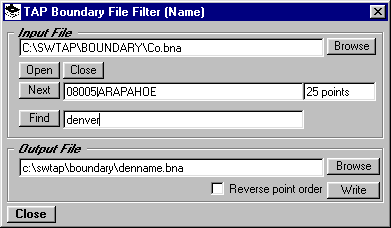
 You can also search for a specific object description
in the file. For example, enter "Denver" in the "Find"
text box. (Note that case is ignored.)
You can also search for a specific object description
in the file. For example, enter "Denver" in the "Find"
text box. (Note that case is ignored.)
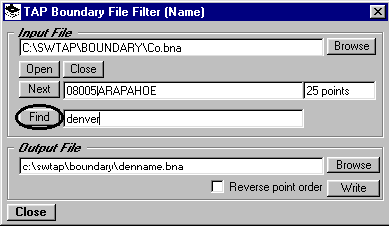
 Click the "Find" button:
 If an object with the specified string in either
the Primary or Secondary ID is found, that object is displayed.
If an object with the specified string in either
the Primary or Secondary ID is found, that object is displayed.
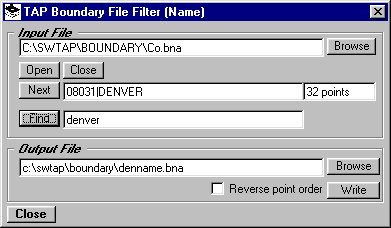 For this tutorial, click the "Write"
button to include Denver county.
For this tutorial, click the "Write"
button to include Denver county.
 When you have completed your selections, click
the "Close" button.
When you have completed your selections, click
the "Close" button.
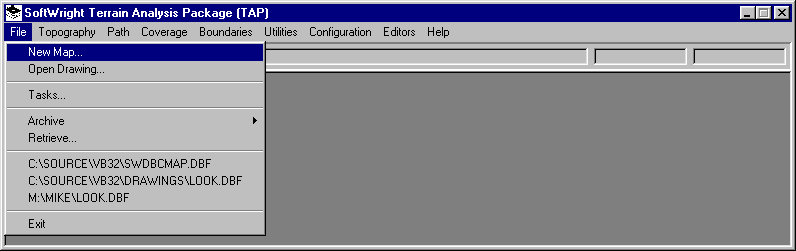
 To view the file you just created, select "New
Map" from the TAP File menu:
To view the file you just created, select "New
Map" from the TAP File menu:
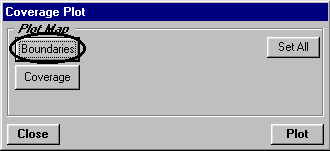
 On the Coverage Plot form, click the "Boundaries"
button:
On the Coverage Plot form, click the "Boundaries"
button:
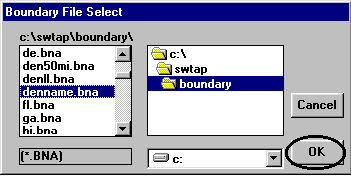
 Find the path and file you just created, then click
the "OK" button:
Find the path and file you just created, then click
the "OK" button:
 The file will be displayed in the boundary file
list.
The file will be displayed in the boundary file
list.
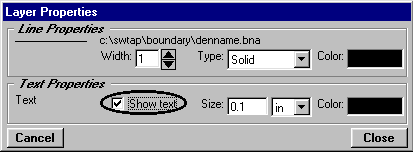
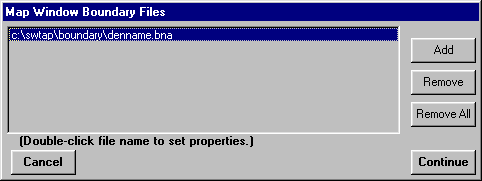 Double click the line showing the file to display
the Layer Properties form. (This form is used for setting colors,
etc., and is discussed in more detail elsewhere.) Be sure the
"Show Text" box is checked:
Double click the line showing the file to display
the Layer Properties form. (This form is used for setting colors,
etc., and is discussed in more detail elsewhere.) Be sure the
"Show Text" box is checked:
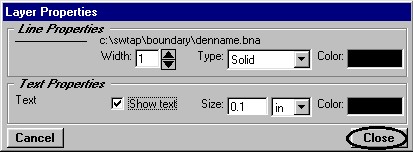
 Click the "Close" button on the Layer
Properties form:
Click the "Close" button on the Layer
Properties form:
 Click the "Continue" button on the Map
Window Boundary Files form:
Click the "Continue" button on the Map
Window Boundary Files form:
 On the Coverage Plot form click the "Plot"
button:
On the Coverage Plot form click the "Plot"
button:
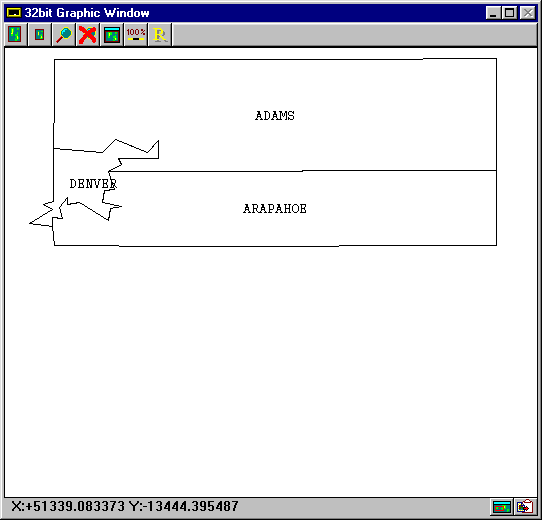
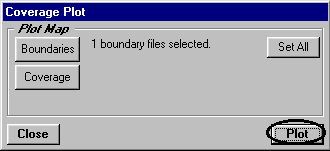 The filtered boundary file will be displayed, showing
only those counties you selected.
The filtered boundary file will be displayed, showing
only those counties you selected.
Copyright 1999 by SoftWright LLC